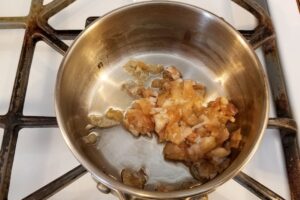
Fried green plantains, also known as Tostones or Patacones, are common all throughout Latin America and the Caribbean. They are easy to make and make a really satisfying snack or side dish. Unripe plantains are cut into chunks, fried until soft, flattened with the back …
Making ceviche at home can be very intimidating to a lot of people. Luckily, if you follow a few basic guidelines, the process is quite simple and can yield very impressive results. This version is made with Ají Amarillo, which lends the ceviche it’s incredible …
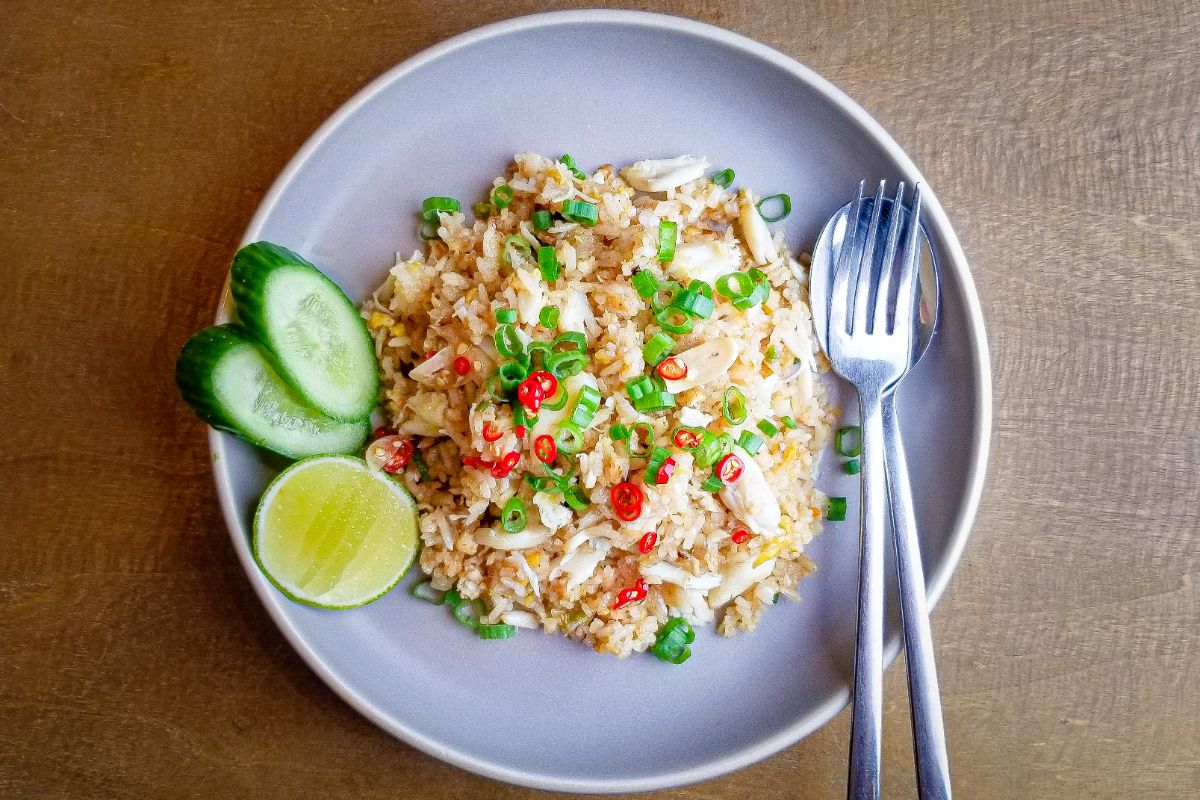
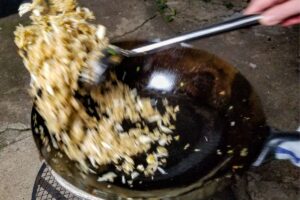
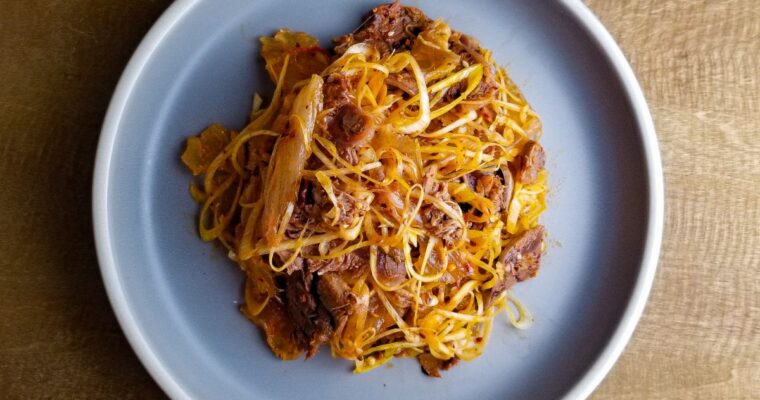
Thai-style crab fried rice, Khao Pad Buu, is a great dish to cook when you have some leftover rice and crabmeat on hand. You can also substitute the crab with any number of proteins…shrimp, chicken, pork…almost anything would work. If you have the rice already cooked, this dish can come together in under 20 minutes from start to finish.
Ingredients
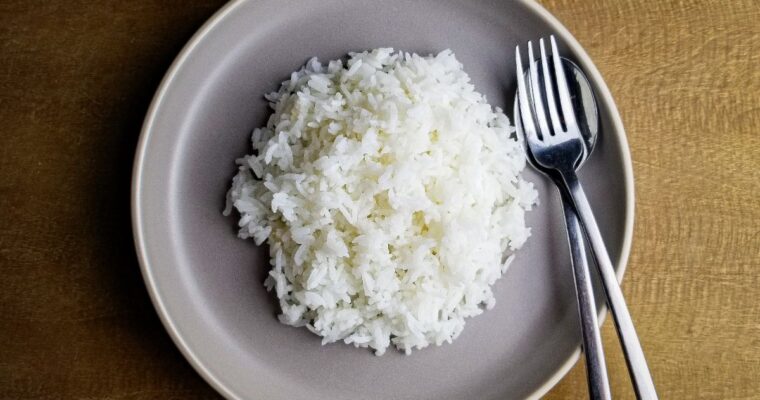
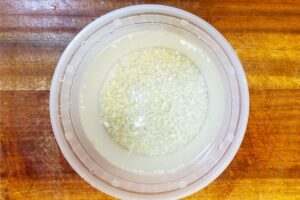
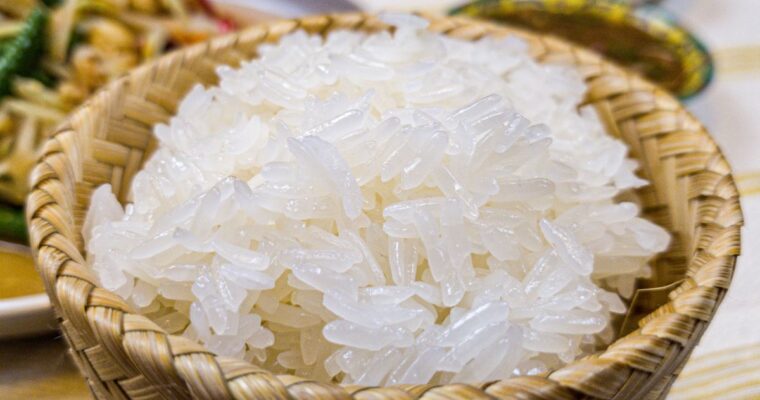
When it comes to making fried rice, the single most important variable to consider is the quality of the cooked rice. Rice that is overcooked or undercooked will yield an inferior product. For Thai style fried rice, be sure to use plain steamed jasmine rice as your starting point. You could use another style of rice if necessary, but the flavor of jasmine rice really complements the fish sauce and crabmeat. Do not use freshly cooked rice for stir-frying. Hot, fresh rice is too soft/moist and the resulting fried rice will likely be gummy and clump together. Use rice that has cooled down to room temperature or even refrigerator temperatures before stir-frying.
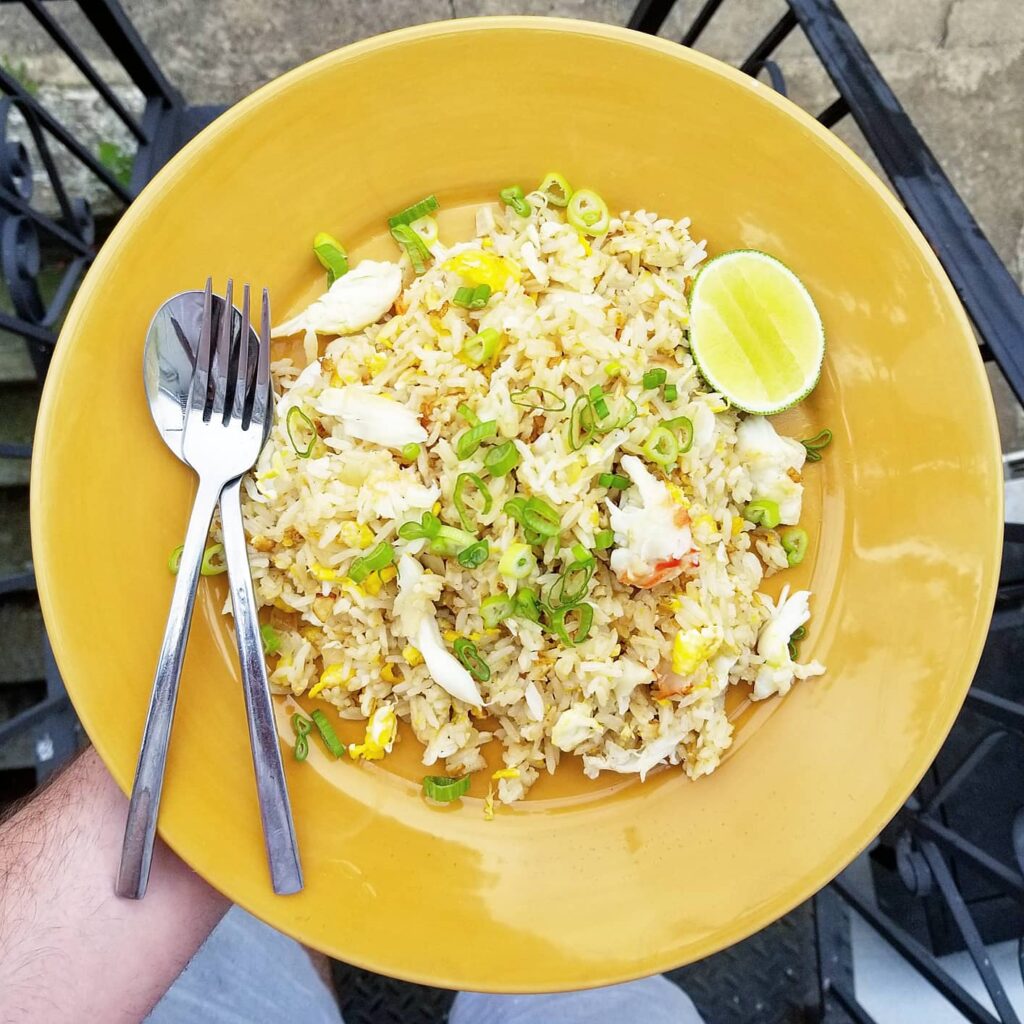
I like blue crab but any crab will work as long as it is fresh and tastes good on its own. This is a batch I made using king crab and ONLY fish sauce (no soy sauce). Also very tasty.
Method
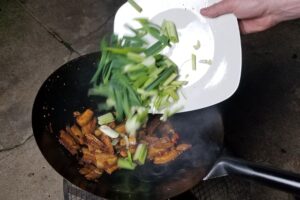
As with any other stir fry, make sure you read the recipe and have all of your ingredients cut and measured before you start cooking. The cooking process will be quick and you need to pay attention in order to get good results. You do not want to be cutting and measuring while you are in the process of cooking over a hot flame. Proper planning will make the whole experience of stir-frying much more enjoyable.
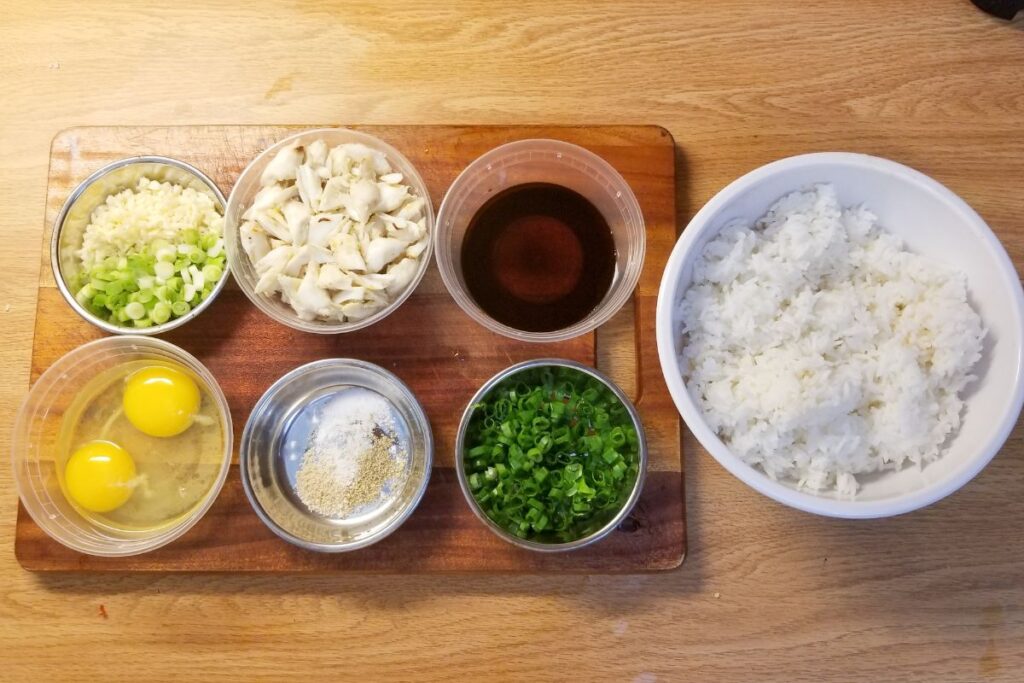
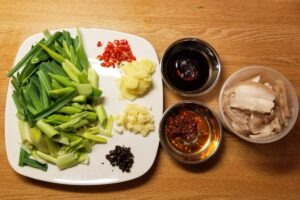
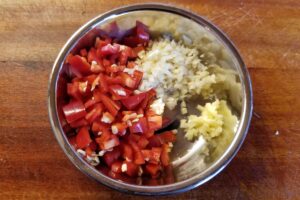
Make sure you have everything ready before you start stir-frying.
The trick to successfully making fried rice is to ensure that the rice does not stick to the pan as you are cooking it. If the rice begins to stick, you will not be able to properly fry all of the rice and you may risk scorching the dish. Using a well-seasoned wok or cast-iron/steel pan is very helpful as they are essentially non-stick. You could also use a non-stick pan for this recipe but just make sure you do not get the pan too hot or the non-stick coating could deteriorate. If you are using a stainless steel pan you will have to be very careful to keep the pan hot while cooking or else the rice could stick.
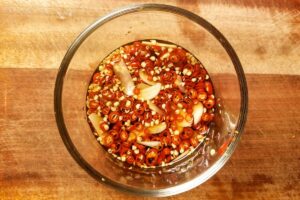
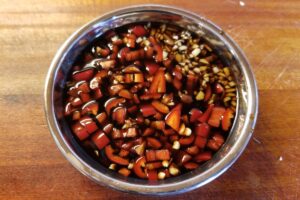
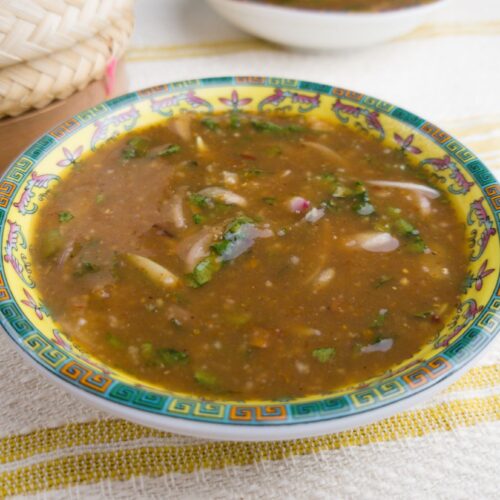
I will also be attaching a recipe for prik nam pla, chilies marinated in fish sauce. This condiment is often served alongside crab fried rice to provide a spicy, salty kick. It will only take about 3 minutes to put together and is optional. The crab fried rice is slightly under-seasoned in order to account for the occasional drizzle of prik nam pla.
Prik Nam Pla – Chilies in fish sauce.
Needed to make this recipe:
Plain steamed jasmine rice(this recipe is for 2 cups of uncooked rice, the recipe below only requires half this amount)
Chilies in fish sauce – prik nam pla – optional condiment for drizzling on the rice
1.5Tbspfish sauce
4thinly sliced red or green bird chilis
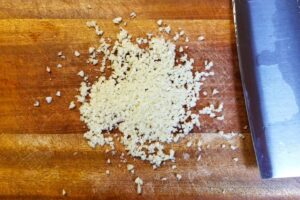
1thinly sliced clove of garlic
Crab Fried Rice
4 Tbspneutral cooking oil
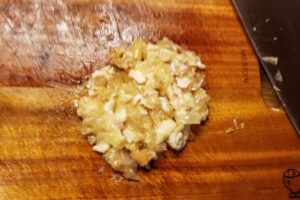
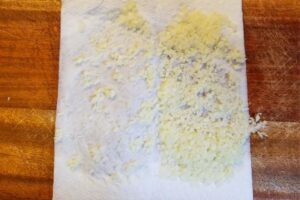
20gramsroughly chopped garlic(about 5 cloves)
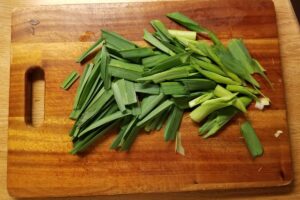
3 thinly sliced scallions, green parts reserved for garnish
2eggs
about4 cups (475g)cooked and cooled jasmine rice(made from 1 cup of uncooked rice, see link above)
1/8tspsugar
1/4tspwhite pepper powder
1/4 tspchicken bouillon powder(optional)
1Tbspfish sauce
1/2Tbspsoy sauce(can omit and substitute with 1/2 Tbsp fish sauce if a lighter colored fried rice is desired)
6ouncesfresh crabmeat(about 1 cup loosely packed)
lime wedges and cucumber slices for serving
Instructions
Chilies in fish sauce – prik nam pla
Combine fish sauce, sliced chilies and garlic in a small bowl and set aside until ready to eat
Crab Fried Rice
Make sure you have everything cut and measured before you start cooking. I like to put the garlic and scallion whites in one container; the white pepper, sugar, and bouillon powder in another container; and the fish sauce and soy sauce in another container. This makes cooking a bit easier as these different groups of ingredients will be added to the pan at the same time.
**If your pan is small or your burner is not very powerful, Divide your ingredients in half and cook the fried rice in 2 batches, this will ensure you can properly stir-fry (instead of steaming) and will keep the rice from sticking to the pan.. A well-seasoned wok or cast iron pan will also help reduce sticking**
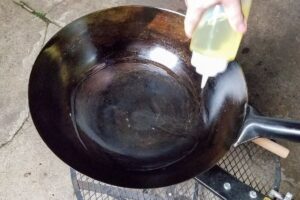
Heat the wok or pan over medium-high heat and then add the cooking oil. *see note below regarding temperatures*
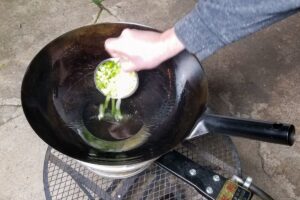
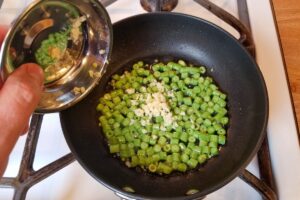
Add the garlic and scallion whites to the hot oil. (save the scallion greens for garnishing)
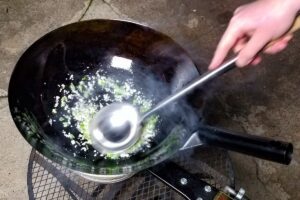
Cook the garlic and scallion whites over medium-high heat for about 10-15 seconds until they are aromatic but not brown.
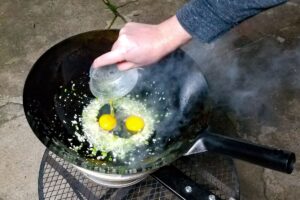
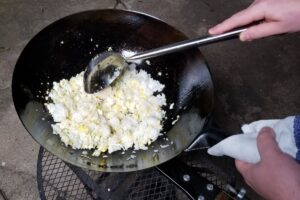
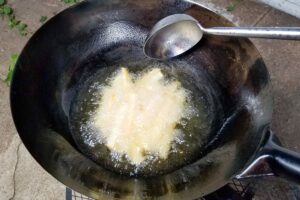
Add the eggs. If the temperature of the pan is correct, they should start to bubble up and cook immediately without burning, sticking, or scorching.
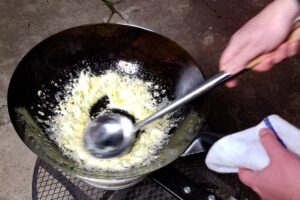
Break up the eggs with the back of your spoon or spatula and begin to cook while stirring. If the temperature of the pan is correct, the eggs will actively cook and scramble without burning or sticking. Cook for about 10-15 seconds until the curds are set.
Turn the heat up to high and add the cooked rice. Begin to break up the rice with your spoon or spatula. Stir fry for 30 seconds.
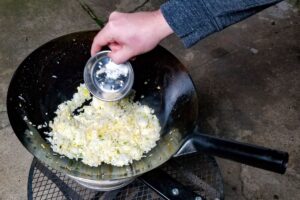
Add the white pepper, sugar, and bouillon powder and toss to combine.
Stir fry the rice for about 1 minute.
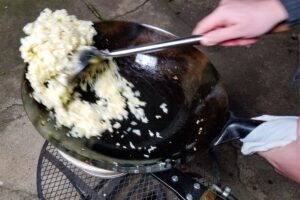
Add the fish sauce and soy sauce around the edge of the pan and stir fry for 1-2 more minutes. Rice should start to slightly dry out without burning.
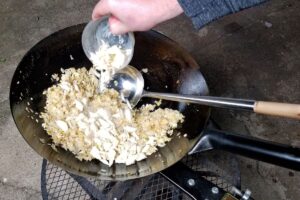
Add the crabmeat.
Stir fry the rice for 1-2 more minutes until everything is hot, well combined, and the grains of rice are separate, not clumpy.
Serve on 2 plates (1 plate if part of a larger, family-style meal) and garnish with sliced scallion greens. Serve fried rice with lime wedges, cucumber slices, and the chilies in fish sauce for drizzling.
Notes
*the temperatures in this recipe are geared towards home stoves, if using a hi-output wok burner the temperatures will be lower. All home stoves are different so use your best judgment of temperature to ensure you are stir-frying without burning or scorching the rice.
I can not overstate the importance of a properly cooked pot of steamed jasmine rice. Whether you are eating it plain (as part of a larger meal) or using it in dishes like fried rice or pad kaprao, properly or improperly cooked jasmine rice can …
This spicy “salad” of thinly sliced beef and beef tendon is a great addition to a larger family-style meal. If you like cold spicy Sichuan dishes like husband and wife beef and pork belly in garlic sauce, you will definitely enjoy this dish. The overall …
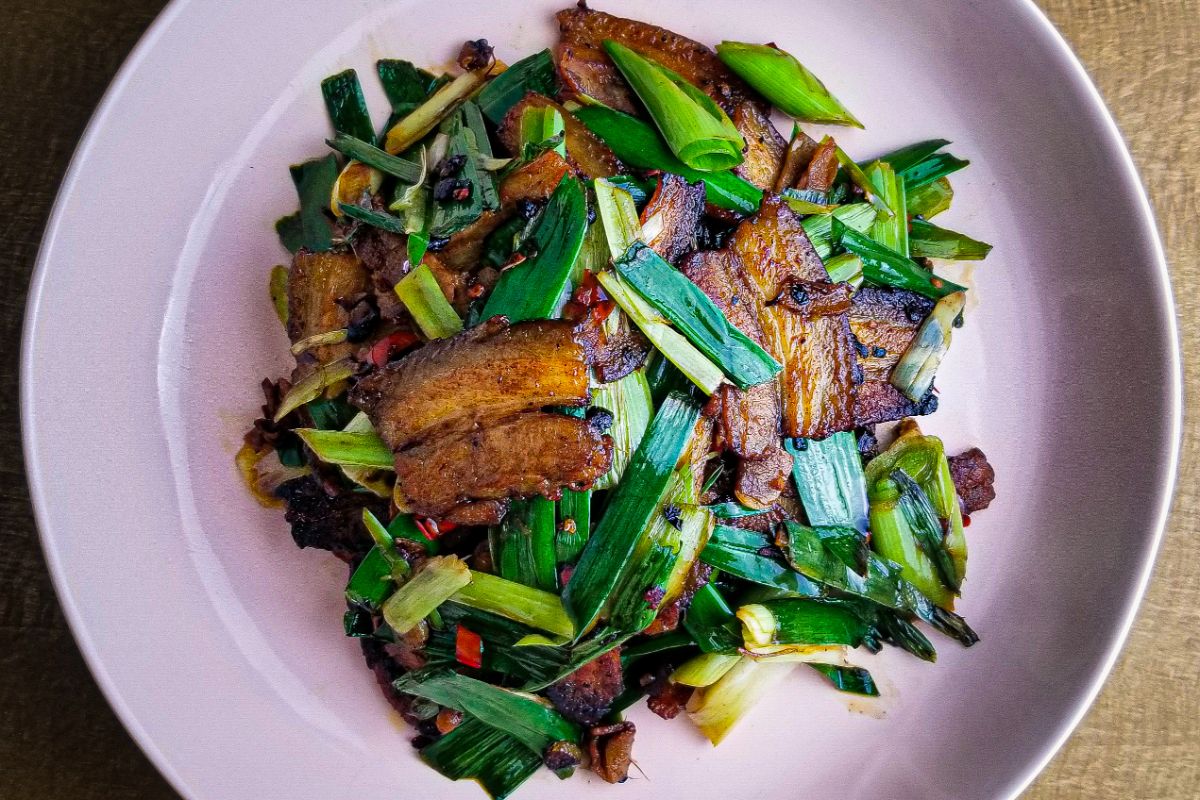
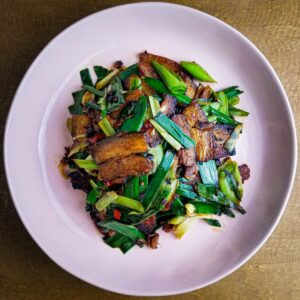
Twice cooked pork is a stir-fried dish from Sichuan that is definitely worth adding to your home cooking repertoire. The basic technique is simple. Pork is simmered, sliced, and then stir-fried with green garlic and aromatics. Served with a bowl of freshly steamed rice, this is an undeniably addicting dish. I like to cook this dish in a wok but you could also use a large saute pan.
Ingredients
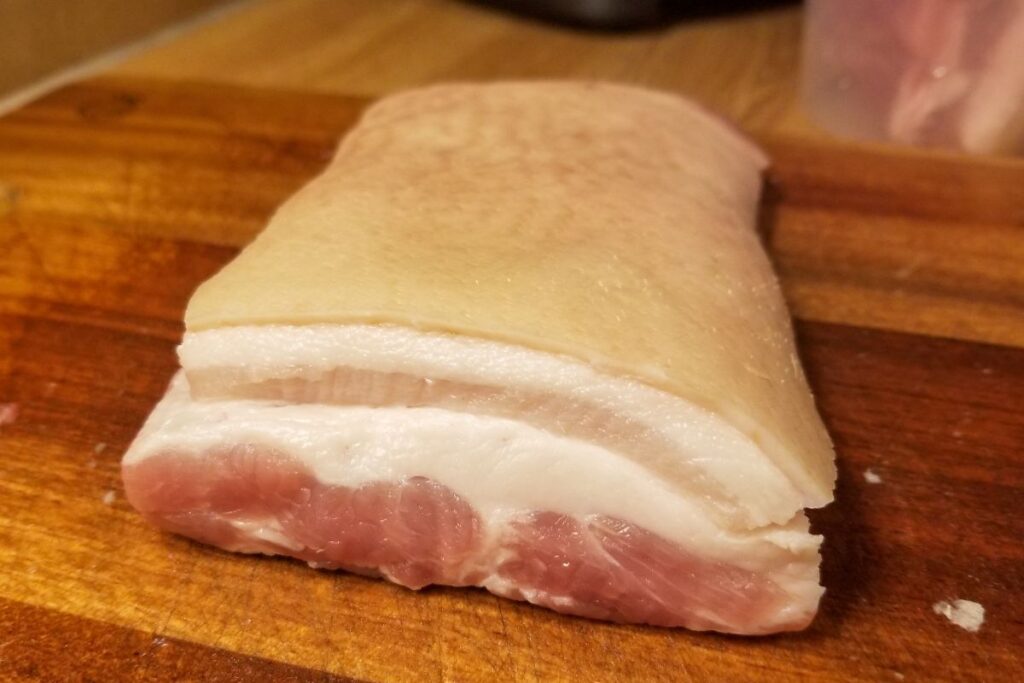
Pork Belly
I suggest using skin-on pork belly for this dish. While it is often made with skin-on pork leg, pork belly is much easier to source in the US and contains roughly the same ratio of fat, lean meat and skin. If your pork belly comes with some bones attached, remove them and save them for another use The pork skin adds a great chewy texture to the dish but if that is something that turns you off, you could remove the skin, although I don’t recommend it.
Pork Belly
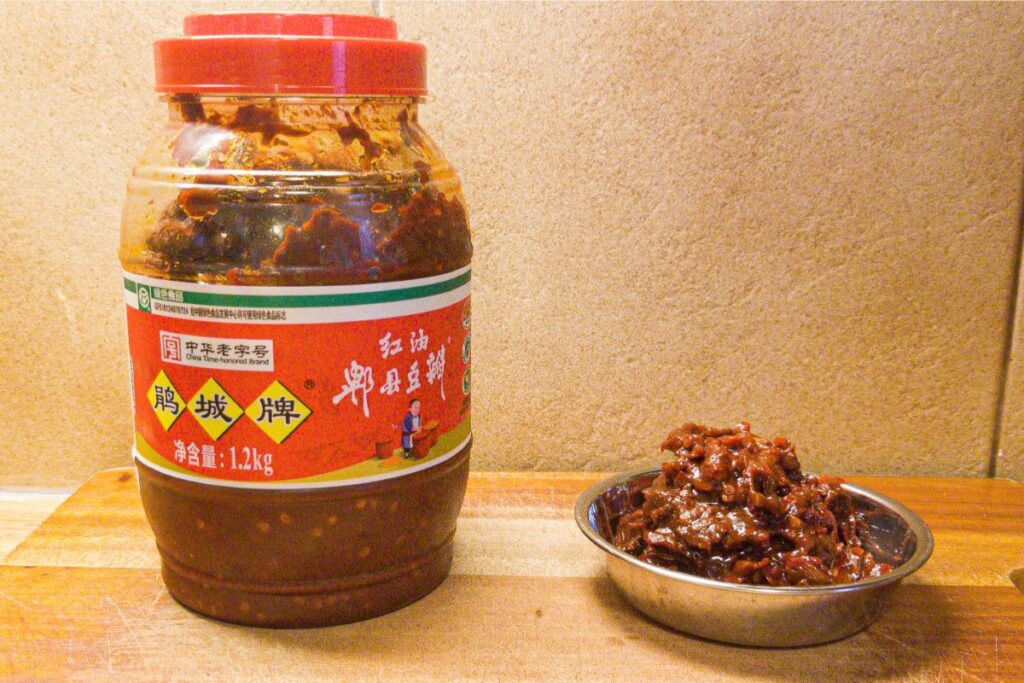
Doubanjiang – Sichuan chili bean paste
This is a vital ingredient to twice-cooked pork and if you can’t get your hand on any, don’t bother trying to make this dish. Doubanjiang is a spicy, savory, salty, and oily condiment that is made with fermented broad (fava) beans and chili. Luckily it can be found on Amazon and most Chinese grocery stores. I like using Pixian doubanjiang, which made in the Pixian region of Sichuan. The English labeling can get a bit confusing but look for something along the lines of “Pixian chili (broad) bean paste”.
Pixian Doubanjiang AKA chili broad bean paste
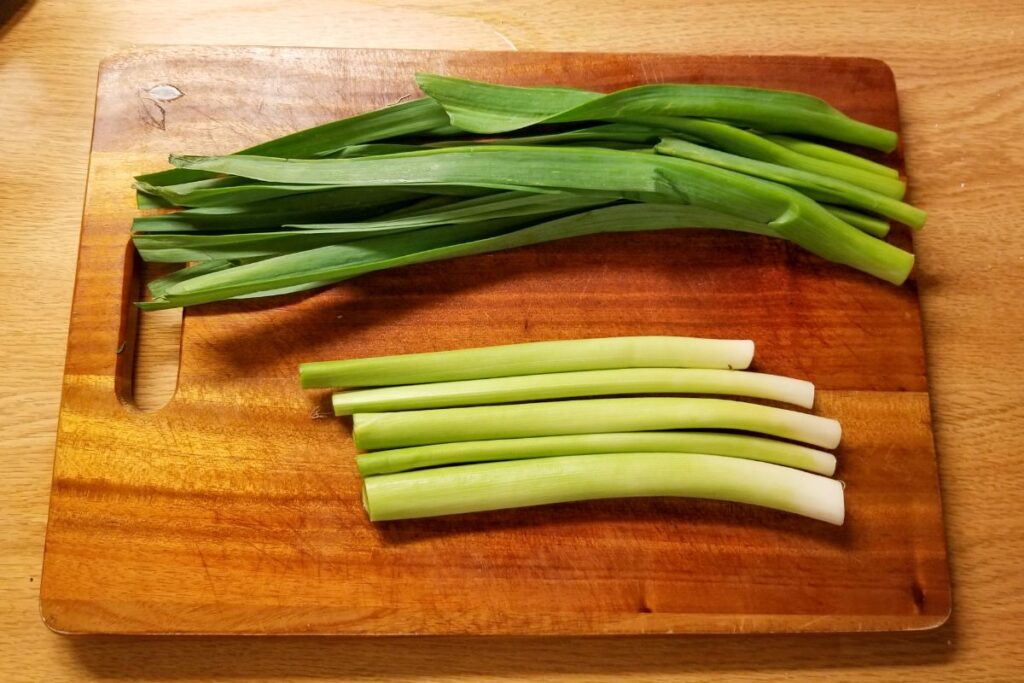
Green Garlic
I like to use young green garlic for this dish. This green garlic resembles a thin leek and does not have the garlic “bulb” formed at the bottom of the stalk. I find this stuff pretty much year round at my local Chinese grocery store. If you can’t find green garlic, you could replace it with leeks, scallions, or even sliced onions.
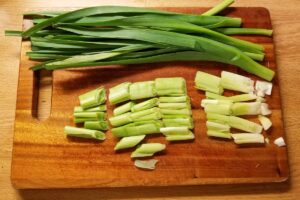
Green Garlic. The white and green parts are separated .
175gramsgreen garlicabout 4-5 stalks – can be substituted with leek, scallion, or sliced onion
10gramssliced red thai bird chiliabout 6 chilies – can substitute with another hot pepper)`
25 gramsginger, peeled and cut into thin slices
15 gramssliced garlic4-5 cloves
2tspSichuan chili bean paste (doubanjiang)
1/2TbspFermented black beans (douchi), roughly chopped
1/2TbspSweet wheat paste (tianmianjiang)– can be omitted or substituted with hoisin sauce
1tspdark soy sauce
1 tsplight soy sauce
1 tspChinkiang vinegar
pinchmsg 1/4 tsp
pinch sugar1/4 tsp
Instructions
Simmer the Pork
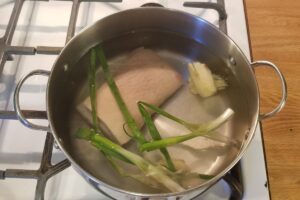
Add the pork belly, water, ginger, scallion and shaoxing wine to a pot and bring to a low boil. Keep the pork belly at an active simmer for 45 minutes. You are not looking to get the pork belly tender, just cooking it through and slightly tenderizing the skin.
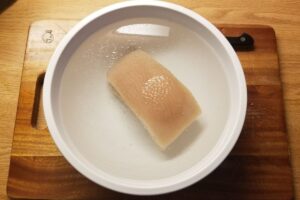
Remove the pork belly from the pot and immediately place it in a bowl with cool water. After 5 minutes in the cool water, add some ice to speed up the cooling process. Allow the pork to cool in the ice bath for at least 15 minutes before removing from the ice bath. Pork belly can be prepared like this up to 3 days in advance and held in the refrigerator, covered, until ready to slice.
Prepping the stir fry
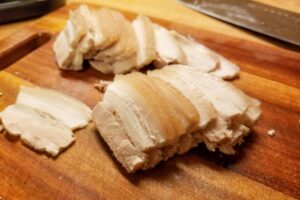
Cut the pork belly into 1/8th inch slices. set aside.
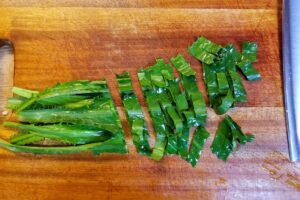
Remove stem ends of green garlic. Use the side of the knife to "whack" and lightly crush the white parts of the green garlic. Cut the green garlic whites diagonally into roughly 1.5 inch sections. Set aside.
Cut the green garlic tops in the same fashion. Set aside.
Combine sweet wheat paste, dark soy, light soy, Chinkiang vinegar, sugar, and msg in a small container and stir to dissolve. Set this "sauce" aside
Make sure you have all of the ingredients cut and ready before cooking the stir fry.
Stir Fry
Place a wok or large saute pan over high heat (medium heat if using a high output wok burner). Add the cooking oil.
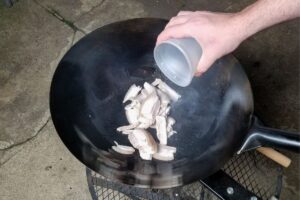
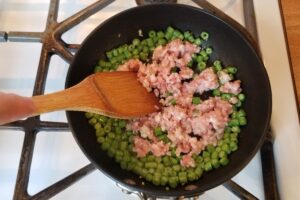
When the oil starts to lightly smoke, add the pork belly to the pan and stir fry for 1-2 minutes.
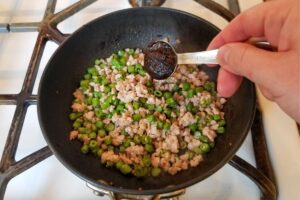
When the pork belly has started to lightly brown, add the fermented black beans and the chili bean paste.
Stir fry over high heat for 20-30 seconds. The pork will start to take on a pleasant red color.
Add sliced garlic, ginger and chilies and stir fry over high heat for about 20 seconds
Add the "sauce" that you mixed earlier and stir fry for about 20 more seconds over high heat
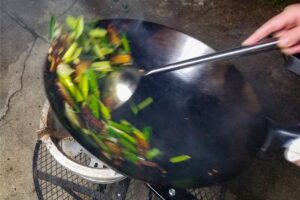
If the heat isn't already all the way up, turn the heat up and add the green garlic.
Stir fry over the highest heat possible for about 15 to 20 seconds and then turn off the heat. The goal is to have the green garlic be wilted but not totally soft and overcooked.
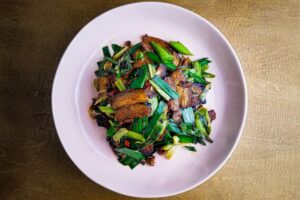
Serve the twice-cooked pork with warm steamed rice
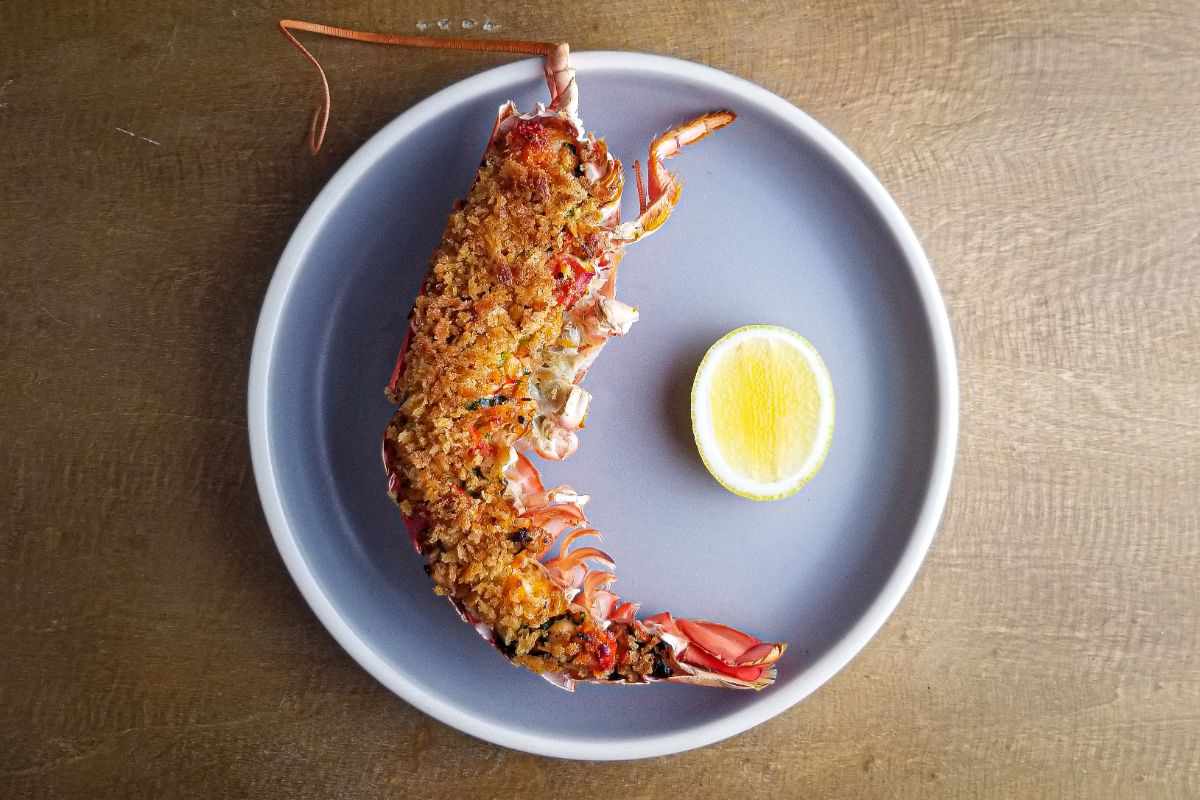
Lobster can often feel like a luxury that is too difficult or expensive to cook at home. While definitely not dirt-cheap, you might be surpised by how inexpensive lobster can be when it is prepared at home. A standard 1.25# lobster can often be purchased …
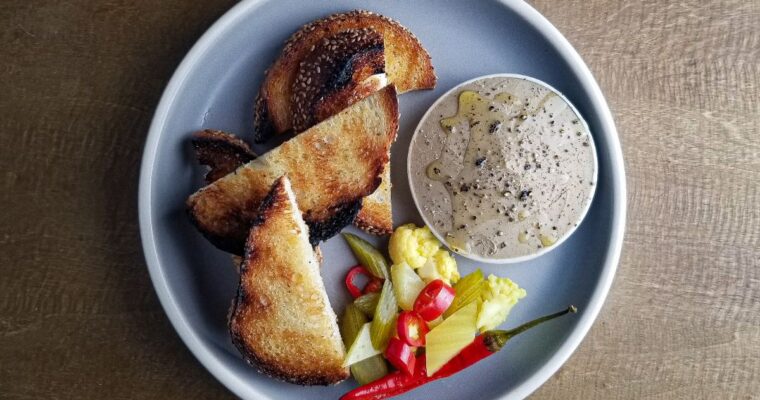
This is a very simple recipe for chicken liver mousse that tastes just as good as the stuff you get at fancy restaurants. The ingredient list is short and the hands-on cooking time is no more than 15 to 20 minutes. If you are entertaining …
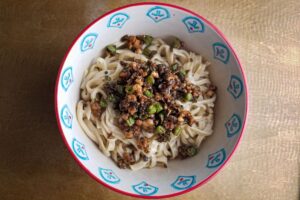
Let me preface this by saying that I am by no means an expert on this dish, I just love eating Dan Dan noodles and this recipe is about as close as I can get to what I consider “ideal”. I have eaten countless bowls of Dan Dan here in the US but my definition of “ideal” was really solidified when I visited Chengdu, Sichuan.
The Dan Dan noodles I ate in Chengdu were quite different from the versions I have had here. First of all, the noodles in Chengdu were much better. They were thick, tasted of wheat, and had a pleasantly chewy texture. Many of the versions here in the US are made with overcooked, flavorless noodles. The Dan Dan sauce in Chengdu was also much better. It was savory, spicy, and coated the noodles well. The chili oil would emulsify into the sauce which gave the noodles a creamy texture, never oily or greasy.
One of the best bowls of noodles we had in Chengdu was here, at Chunyangguan Yuxian Paigumian
Making Dan Dan at home requires making three “main” components separately. Once you have made these components, the bowls of noodles can be assembled. The three components are the noodles, the chili oil, and the topping. The nice thing is, you can buy two of these items (noodles and chili oil) from most Chinese/Asian grocery stores and still yield decent results.
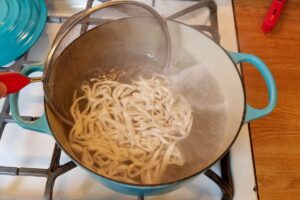
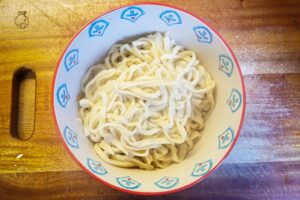
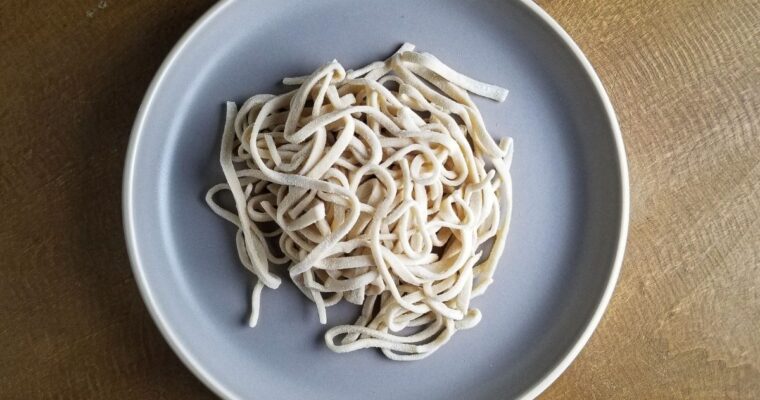
The noodles
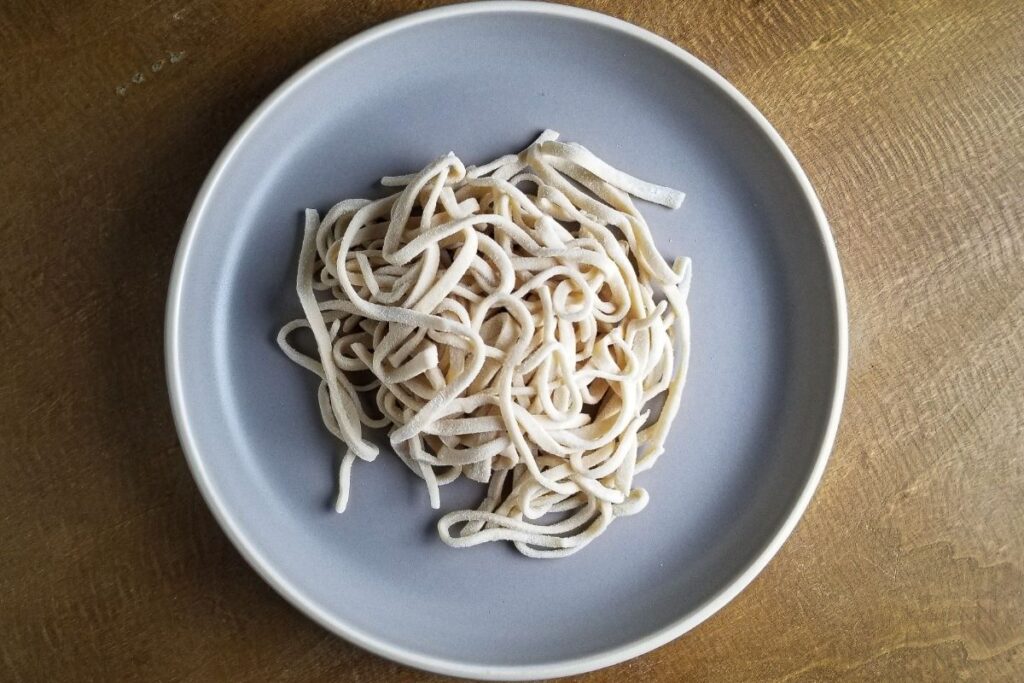
Using high-quality noodles is very important to a bowl of Dan Dan. I think the best way to ensure great results is to make them yourself. The recipe for hand-cut alkaline noodles is linked here. Alternatively, you could purchase fresh noodles from an Asian grocery store. I prefer slightly thicker wheat noodles for this dish (2 mm or 1/8th inch thick).
Hand-cut Alkaline Noodles
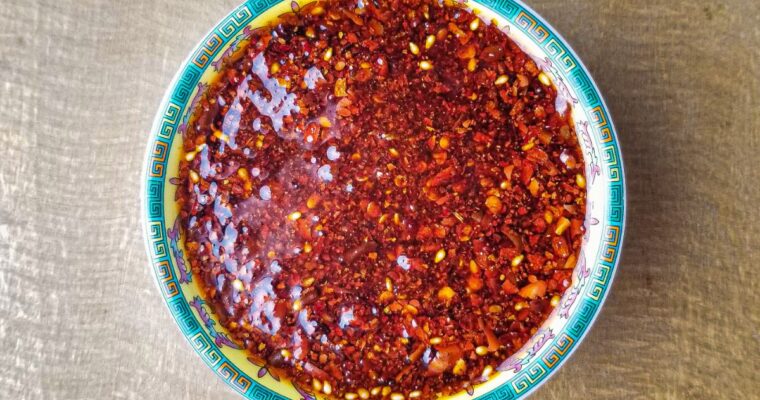
The chili oil
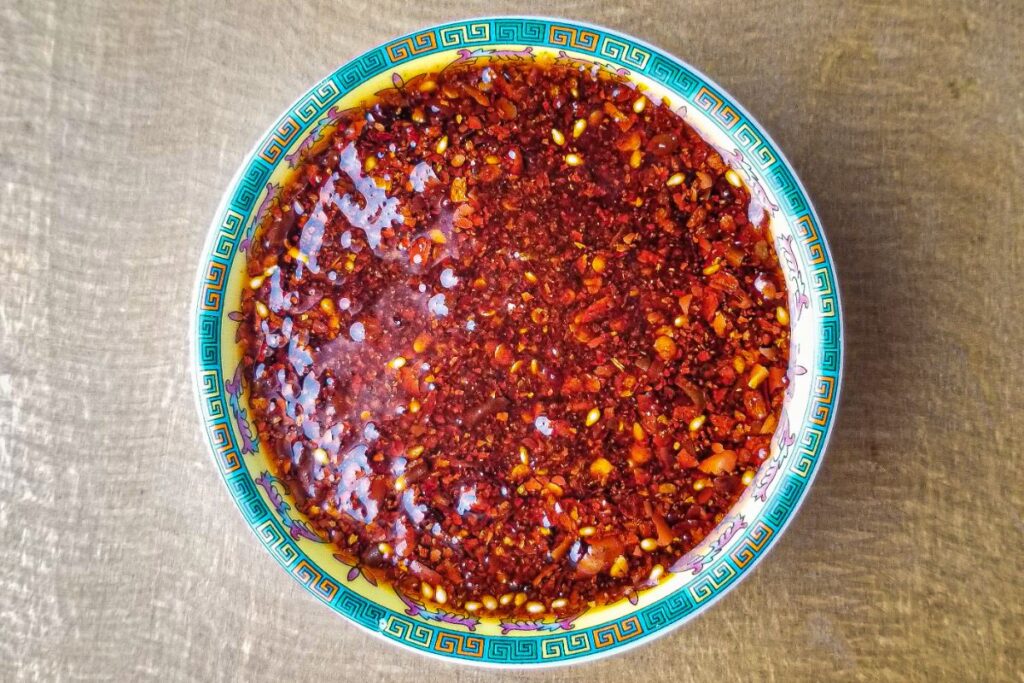
Good chili oil is essential to making a bowl of Dan Dan noodles. I like to make chili oil at home because I can adjust it to my liking and it often tastes better than the store-bought stuff. That being said, if you have a well-stocked Chinese grocery store near you, there are some high-quality Sichuan chili oils you can buy. You can find the chili oil recipe here.
Home-made Sichuan chili oil
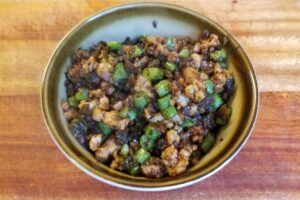
The pork topping
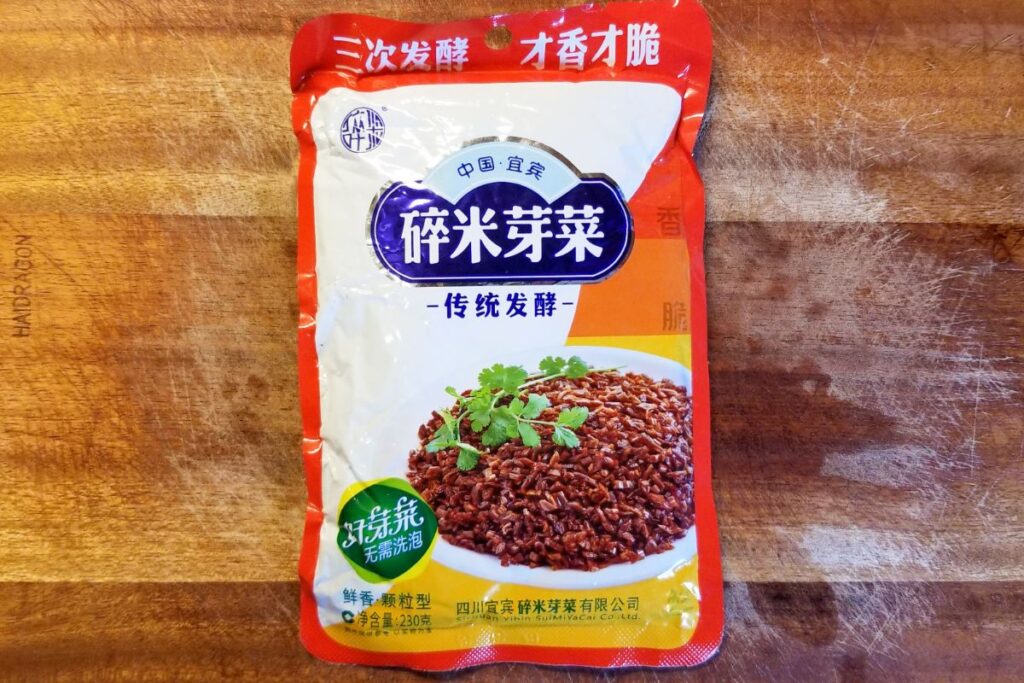
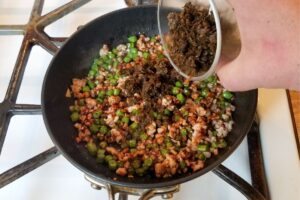
This is the one component that you will need to make yourself. Luckily it is quite easy to make as long as you have the right ingredients. The topping is a mixture of ground pork, suimiyacai (fermented mustard greens), and snake beans that are quickly stir-fried together. The suimiyacai brings a salty, umami, fermented quality to the dish. It can be purchased on Amazon or in many Asian Grocery stores. Snake beans are often served in Dan Dan-style noodles in Chengdu so I added them to this recipe. I prefer snake beans to the more typical blanched bok choy/spinach. The topping can be made a few hours ahead of time and held at room temperature until you are ready to assemble your bowls of noodles
Suimiyacai
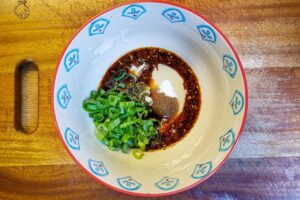
Final Assembly
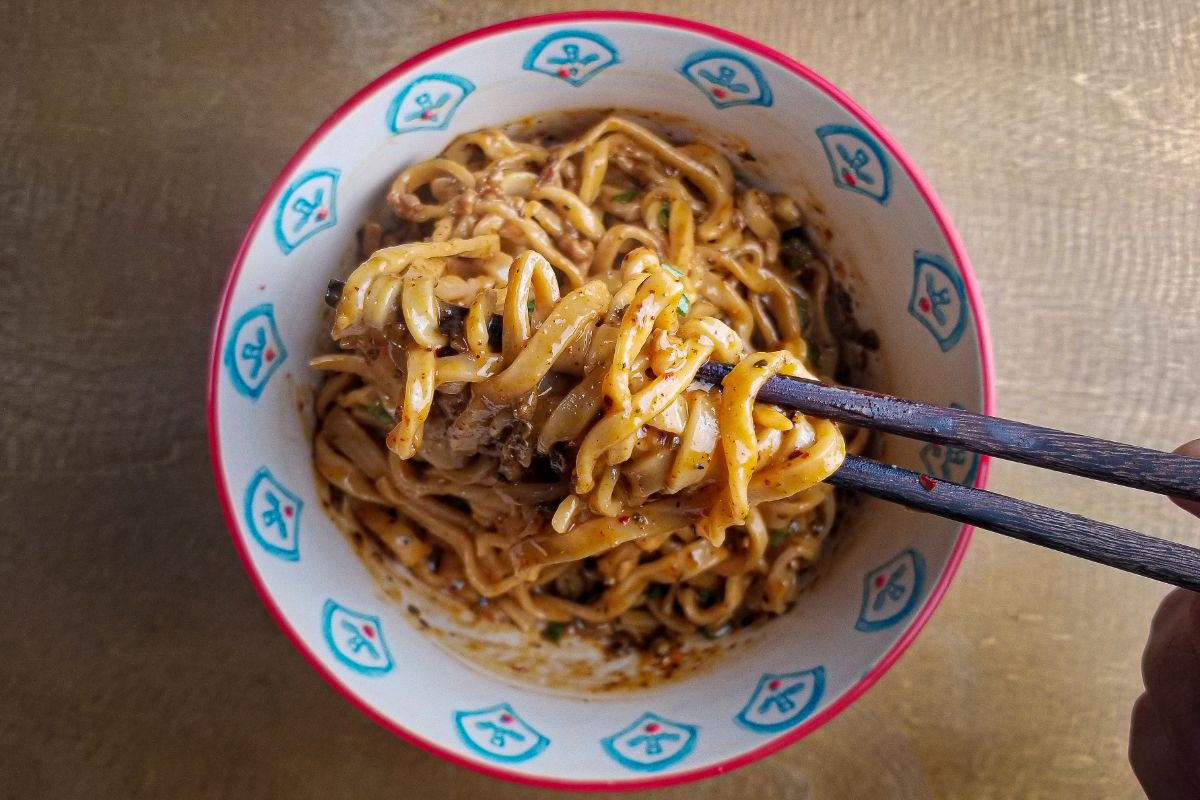
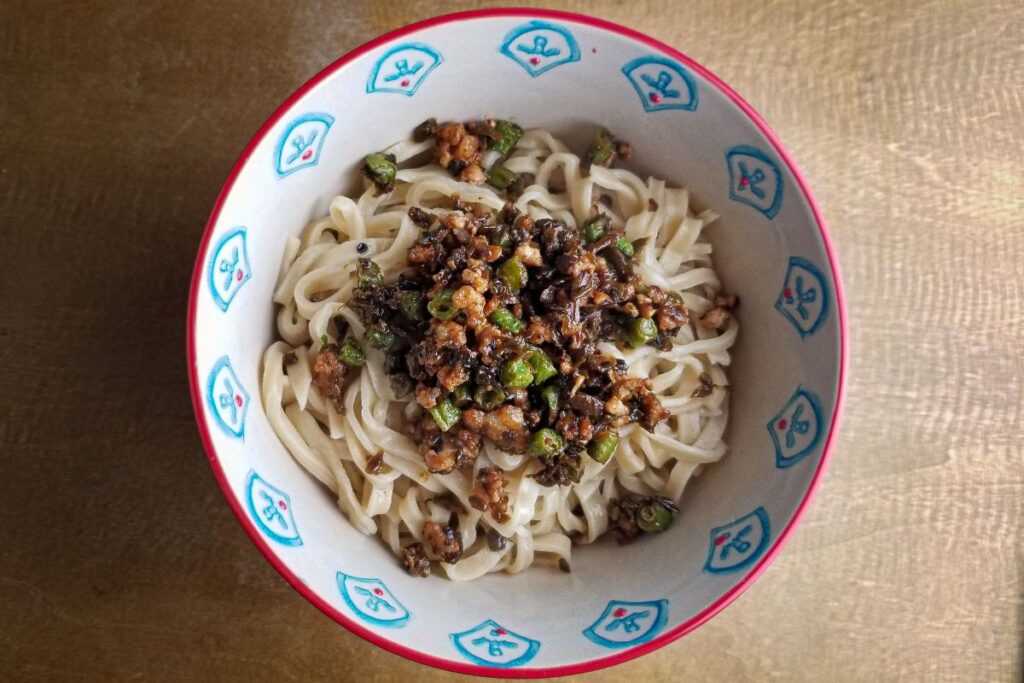
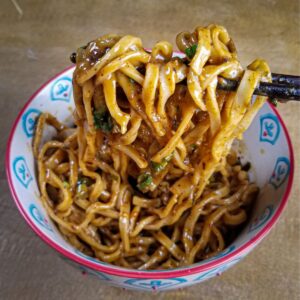
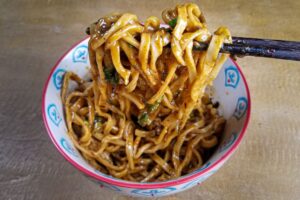
Once you have made the three main components, assembling the bowls is very simple. The chili oil is placed in the bottom of a bowl along with some sliced scallions and a few other pantry items. This will become the “sauce” for the noodles. The noodles are then cooked, placed on top of the “sauce” and finished with a little bit of the pork topping. Make sure to mix your bowl of noodles well before eating!
Dan Dan noodles before mixing and eating. The pork topping can be seen on the noodles.
This is a basic Sichuan-style chili oil that can be used in numerous applications. I always like to have a batch in the fridge as it can bring a little heat and sparkle to many dishes. It’s great for drizzling on dumplings, in soups, on …
These thick alkaline noodles are great for making dandan noodles but will also work well in noodle soups and many other hot and cold preparations. While not specifically designed for it, this dough could be also be used to make Japanese-style ramen noodles. The noodles …
Making fresh falafel at home isn’t nearly as time-consuming and labor intensive as it may seem. As long as you plan ahead and have the right equipment, falafel can easily be made in 30 to 45 minutes. You can make the accompaniments to your falafel as simple or complex as you like. Don’t let the perceived difficulty of making falafel steer you away from giving it a shot.
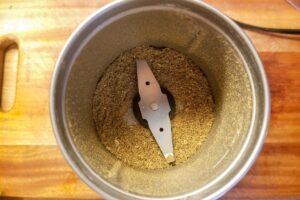
The method for making falafel is quite simple. Soaked chickpeas are ground with aromatics, herbs and spices. This mixture is then formed into balls or patties and fried.
Falafel sandwich
Ingredients
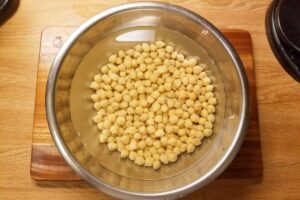
First things first, you have to use dried chickpeas to make good falafel. Canned cooked chickpeas will yield a mushy, dense falafel….no good. The dried chickpeas need to be soaked overnight in at least double their volume of cold water. The chickpeas will swell and absorb much of the water and if you don’t properly cover them, some chickpeas will eventually end up above the “water line” and not soak properly. The chickpeas can be soaked at room temperature or in the fridge.
I like to use whole fresh spices, which I grind for each batch of falafel, but powdered spices would also work well. I also use fresh turmeric in this recipe, but if you do not have access to it, powdered turmeric would work.
Equipment
You can make this falafel using one of three pieces of equipment…blender, food processor or meat grinder. You can get good results with all three but some methods have their advantages.
Using a blender is probably the most difficult way to make falafel. That is not to say it can’t be done … I have used a blender many times with good results. However, I wouldn’t try to make big batches of falafel using this method. The reason for this is that you need to carefully pulse the falafel in many small batches in order to achieve a good, consistent grind. This is much more time-consuming than using a food processor or meat grinder. If you choose to grind your falafel in the blender, do not fill the blender more than 1/3 of the way and pulse the falafel mix in small batches until all of your falafel is ground. Use a spoon to stir the falafel in between pulses to help achieve an even grind.
A food processor can grind much more falafel at a time and is easier to use. The food processor mixes the falafel as it is running which will keep you from having to stop and stir falafel in between pulses.
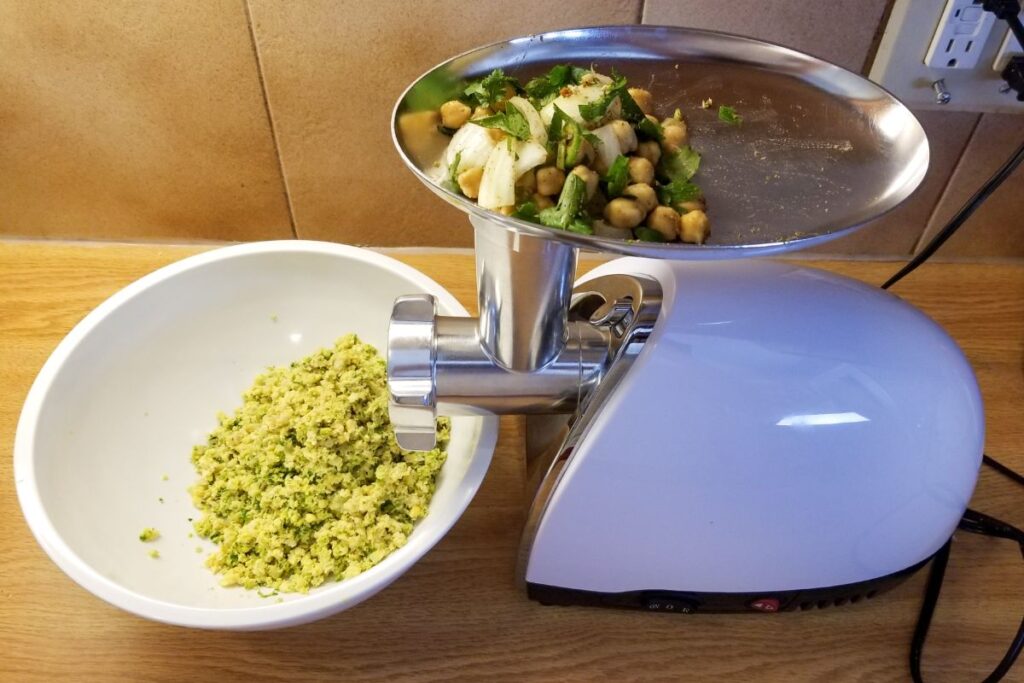
Using a meat grinder is my preferred method for making falafel. That is because it yields a very even grind on the falafel and it is REALLY fast. I use a 5 mm die for falafel but a smaller die would also work. Clean up is really simple because the falafel (unlike ground meat) isn’t fatty and will easily rinse off of the grinder’s moving parts. I understand most people don’t have a meat grinder at home, but if you do, I highly recommend using it. Good electric meat grinders can be found online for under 60 dollars and are totally worth the investment.
Using the meat grinder to grind falafel.
Deep fry?
While this recipe calls for deep-frying the falafel, this is not necessary and pan frying the falafel is equally delicious. I actually pan fry much more often when cooking during the week. Pan frying uses less oil, which in turn allows me to cook the falafel in olive oil instead of vegetable oil (I wouldn’t dare fill a deep fryer with extra virgin olive oil to cook a few falafel on a Tuesday night).
Deep-frying can achieve nice round falafel, but pan frying is much better suited to forming the falafel into disc shaped patties. This will make it much easier to cook them as you only have 2 sides to cook. If you try to pan fry spherical falafel, you will need to be constantly turning and rotating the falafel to achieve a nice even cook… which is a pain in the ass.
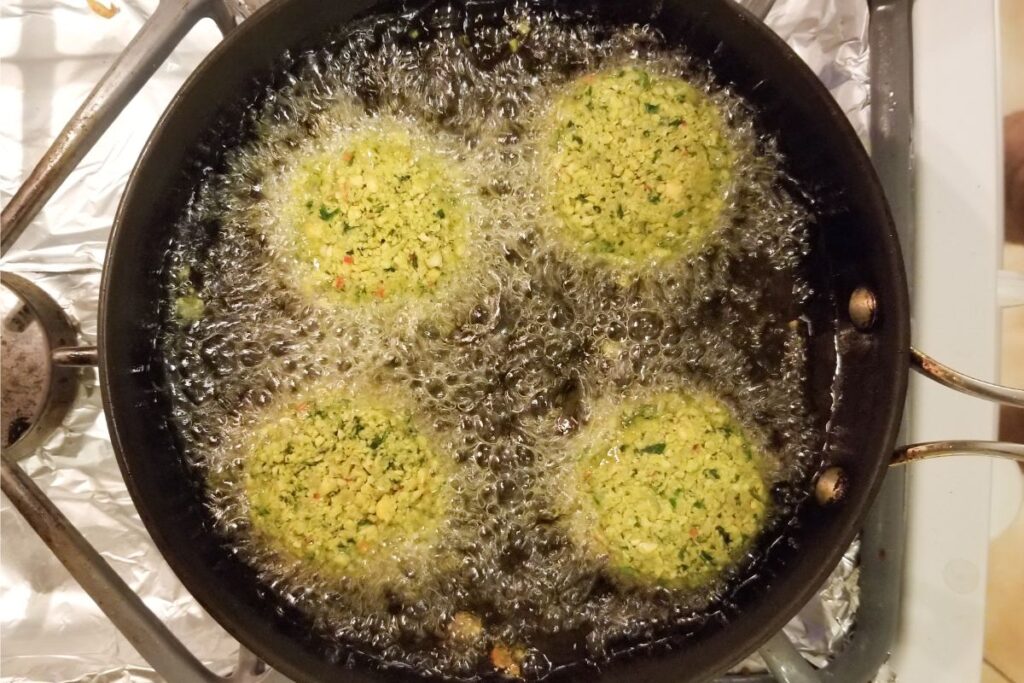
To pan-fry the falafel, make disk shaped patties that are approximately 3/4 inch thick and 2 inches in diameter. Fill a sauté pan with about 1/2 inch of olive oil and fry a few of the patties over medium heat for about 3-4 minutes per side. Oil should sizzle as the falafels cook but not so hot that the falafel burn in the time it takes to cook them. Be very delicate with the falafel when adding them to the oil and flipping them. The falafels will want to fall apart at first. Once they have developed a crust they will hold together much more easily. Once they are nicely browned on both side, rest them on paper towels and cook the rest of the falafel in batches.
Falafel “patties” being pan-fried in olive oil. Just as delicious as the deep-fried version.
Falafel
Ian Benites
A simple fresh falafel recipe that can be made quickly. This recipe can be deep fried as well as pan fried using olive oil.
20gramsrough chopped cilantro, leaves and stems1 cup loosely packed
12 gramsrough chopped parsley, leaves and stems3/4 cup loosely packed
1gramwhole cardamom pods5 pods
1gramcoriander seed1 tsp.
2 gramscumin seed1 tsp.
1gramblack peppercorn1/2 tsp.
5 gramssalt(1/2 Tbsp diamond crystal kosher salt)
4 gramsbaking powder1 tsp.
6cupsneutral flavored frying oil (canola, vegetable, corn….etc)Or 2/3 cup olive oil if pan frying
Instructions
Soak the chickpeas overnight in at least double the volume of water.
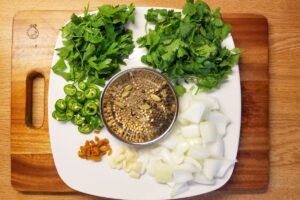
Gather and cut all the ingredients
Grind the spices in a spice grinder or mortar and pestle.
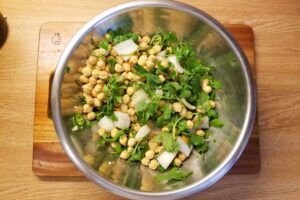
Drain the soaked chickpeas VERY WELL and mix all the ingredients except the baking powder and cooking oil. The chickpeas need to be very dry before mixing so the falafel mix is not too wet.
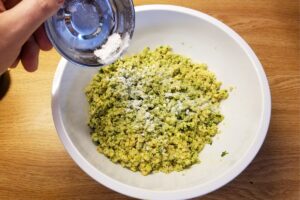
Grind the falafel mix using a 5 mm grinder die. Alternatively, process or blend the mix until a medium-course texture is achieved. The falafel mixture should just hold together when squeezed into a ball.
Sprinkle on the baking powder and mix well with your hands. Taste the mixture at this point and adjust seasoning with more salt if desired.
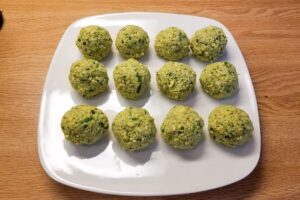
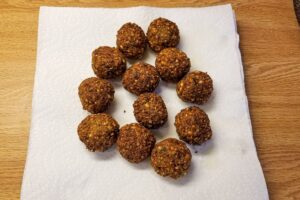
Roll the falafel into 50 gram balls and set aside. Falafel should hold together although it will still be a bit delicate if handled roughly. This recipe will yield about 12 balls.
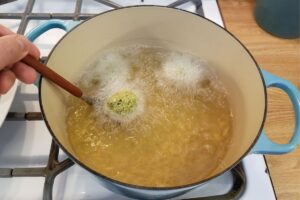
Add the oil to a pot and heat to 350 Fahrenheit. Make sure the oil does not come up more than 1/3 of the way up the pot to avoid a boil over. Oil should be about 1.5 inches in depth. If necessary, add more oil.
Carefully lower 6 of the falafel balls into the oil using a spoon. This needs to be done carefully as the falafel will want to fall apart in the first 30 seconds of cooking. After 30 seconds, a crust will form that will keep them from falling apart.
Oil temperature should drop to about 325 Fahrenheit once the falafel are added to the pot. Try to maintain 325 as the falafel cook.
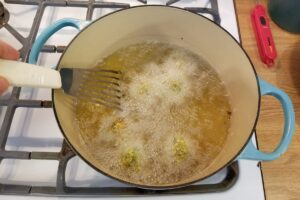
Cook the falafel for 4-5 minutes, stirring the falafel as they cook.
After 4-5 minutes, a good crust should have formed and the falafel can be removed from the oil and placed onto a paper towel lined plate. No need to season with salt as the filling should be well seasoned.
Fry the other half of the falafel balls in the same way.
Allow falafel to cool for 2 minutes before enjoying.
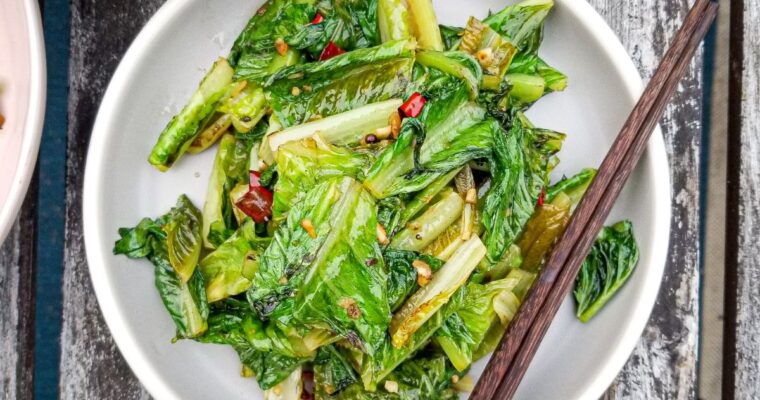
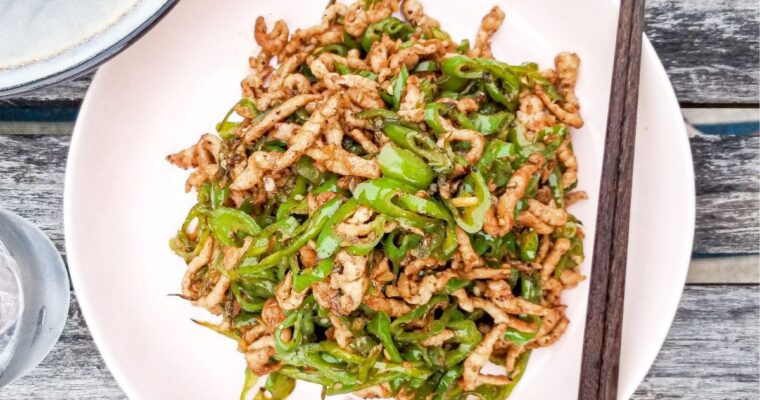
Stir-fried romaine lettuce? It may sound strange but this is a delicious way to use romaine lettuce as a side dish. The romaine is quickly stir-fried over very high heat with garlic, chili and a touch of Sichuan peppercorn. The resulting lettuce is smoky, garlicky, …
Roasted chili powder has so many uses and variations that it would be foolish to try and write a definitive recipe. The type of chili that is used, the spice level, how many seeds are left in the powder, the level of roasted flavor desired, …
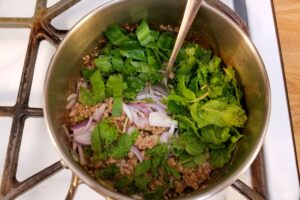
Laap (aka laab, lahb, larb….) is a bit hard to describe to those who aren’t familiar this Thai/Lao dish. In essence, it is a ground meat salad. Ground meat is cooked, seasoned and then tossed with a number of different herbs and garnishes. Broadly speaking, there are two main types of laap…laap Isan and laap muang. The main differences being the way the dishes are seasoned and the regions in which they are most often consumed.
Laap Isan is the style that is made in the northeastern (Isan) region of Thailand. It is the most common style of laap found in Thai restaurants here in the US. It can be characterized by its primary seasonings of fish sauce, dried chili powder and lime juice. The resulting dish is usually spicy, salty, and herbaceous.
Laap muang is the style most prevalent in northern Thailand (Lanna). This style is much less common in the US than it’s Isan counterpart, but is equally delicious. Laap muang does not contain lime juice and has a number of dry spices used in the seasoning. This dish is much more aromatic and deep in its flavor profile.
Raw buffalo laap muang at a laap shack in Chiang Mai.
Any number of proteins can be used in both styles of laap. Chicken, pork, buffalo and seafood are all commonly used as the base for these dishes. Additions of organ meat, blood and bile are often used as well. The herbs can vary but mint, scallion, cilantro are quite common.
Notes on this recipe:
This version of laap Isan has a few extra bells and whistles. That being said, you could easily omit a few of the ingredients and still yield a very delicious result. I like to serve this dish with sticky rice and raw vegetables to eat between bites. Cabbage and cucumbers work well but you could serve the dish with anything you like.
When preparing this laap, remember to turn off the heat after the meat has been cooked through. The shallots and herbs should be mixed in at the very last moment before serving them so that they do not get overly cooked. You want the herbs to wilt a little but still maintain some freshness.
I have provided a sub-recipe for a crispy garlic and chicken skin topping but you could also just use some plain fried garlic or shallots as a topping. A bit of extra toasted rice powder also works well as a topping if you can’t be bothered frying garlic or shallots.
200gramschicken thigh and leg meatone chicken leg and thigh
50 gramsfresh chicken liverabout one chicken liver
7-8Tbspchicken stock (or water)
1/4tspkosher salt
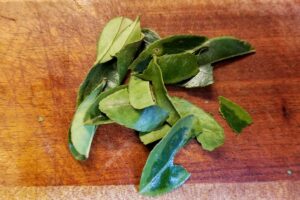
1grammakrut lime leaves (optional)about 6 leaves
2tspgarlicky chicken fat(reserved from making the crispy garlic and chicken skin topping)
1/2tspsugar
1.5Tbsptoasted chili powder ( Arbol chili works well)recipe linked above
4 Tbspfish sauce
2Tbspfresh lime juice
1/2Tbsptoasted rice powder,plus a pinch for sprinkling on toprecipe linked above
60gramsshallotabout 2 medium shallots
15gramsroughly chopped cilantroabout 1/2 cup chopped
30gramsthinly sliced scallionabout 2 scallions
10gramsroughly torn fresh mint leavesabout 1 loose cup leaves
10 gramssawtooth herb AKA culantro (optional)about 6 leaves
2-3toasted dry arbol chilis for garnish (optional)
Serve with:
sticky rice
wedges of raw green cabbage and slices of cucumber
Instructions
Crispy garlic and chicken skin topping
Roughly chop the chicken skin, set aside
Chop the garlic
Place chopped garlic in a cup of very hot tap water and allow to rest for 10 minutes (this will make the fried garlic a bit less pungent after frying)
Strain garlic from water and pat dry using paper towels, set garlic aside.
Place chicken skin in a small pot with 1.2 Tbsp oil. Turn heat to medium low.
Cook chicken skins over medium-low heat while stirring until skins start to lightly brown and get crispy. About 5-10 minutes. Turn down heat if skins are getting too dark.
Strain out crispy skins and lay on paper towls. Season lightly with salt. Keep the rendered chicken fat in the pot.
Let chicken fat cool down a bit and then add the garlic that you prepared earlier.
Turn heat up to medium and cook until garlic starts to sizzle. Once sizzling, turn heat down to medium low and cook while stirring. You can also use a thermometer and try to maintain around 300 Fahrenheit, no hotter than 315.
Cook garlic until garlic has lightly browned and the sizzling has subsided
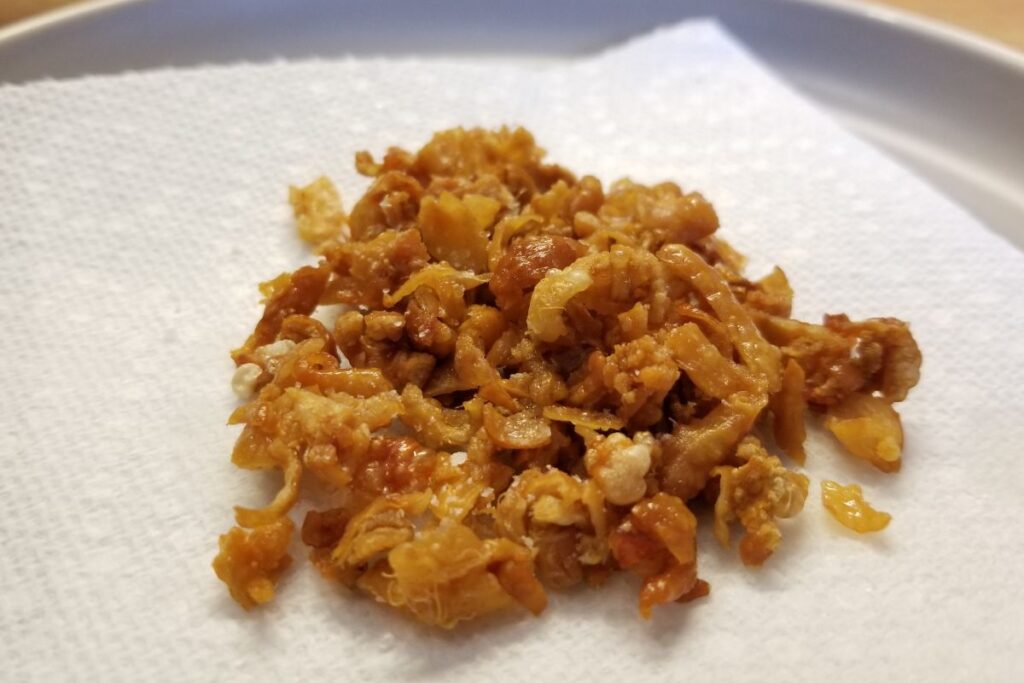
Strain out crispy garlic and mix with crispy chicken skin, season with a touch more salt. Reserve the garlicky chicken fat to mix into laap later.
Prepping the Laap
Slice the shallots and set aside
Slice the sawtooth herb (culantro) and mix with the torn mint leaves, chopped cilantro and sliced scallion. Set aside herbs.
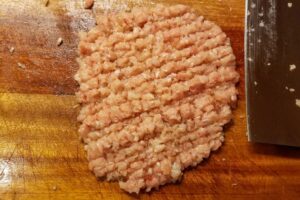
Chop the chicken thigh and leg meat by hand. It should be slightly coarser than store bought ground chicken. Set aside
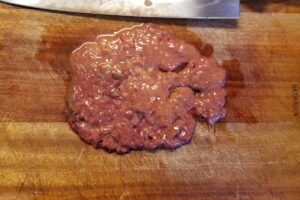
Chop the chicken liver in the same way. Set aside
Roughly tear the makrut lime leaves and set aside
Cooking the laap
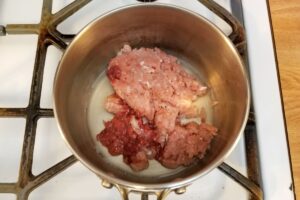
Place chicken stock (or water), chopped chicken and chicken liver into a small pot.
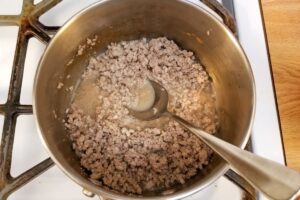
Turn heat up to medium high and start to cook meat while stirring. Season with the 1/4 tsp. salt while cooking. There should be some liquid at the bottom of the pot after cooking.
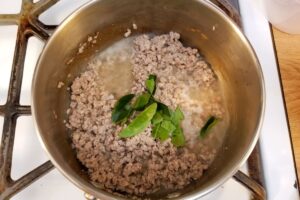
Once chicken is just cooked through, turn off the heat and stir in the torn makrut lime leaves.
Off the heat, add the rest of the ingredients to the pot in the order shown in the recipe list. Stir a few times to combine and taste. Herbs should wilt slightly but still maintain some structure. If necessary adjust seasoning now. Laap should have a little bit of liquid seeping out of the bottom, if too dry, add a touch more stock or water.
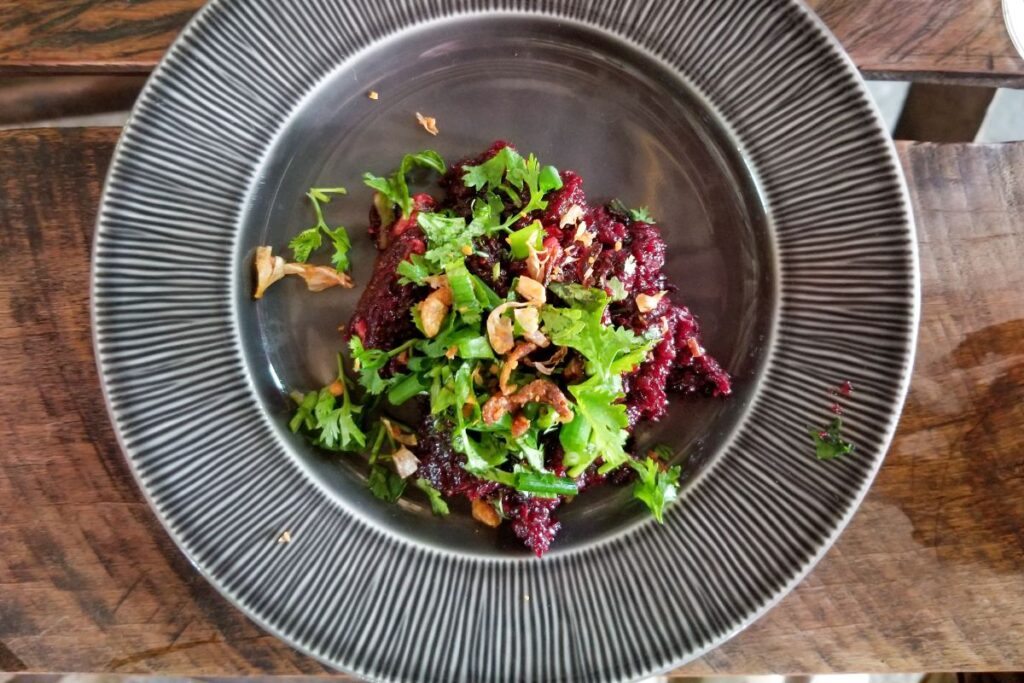
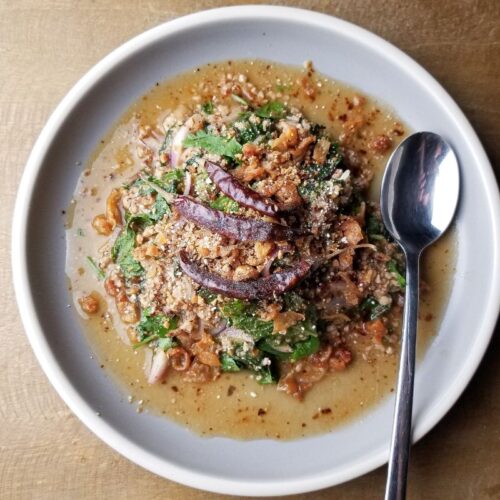
Spoon laap onto a plate and sprinkle with the crispy garlic and chicken skin topping, a bit of toasted rice powder and garnish with a few optional toasted arbol chilis.
This is a spicy and addicting home-style Sichuan dish that is easy to put together for a weeknight meal. It goes really well with some steamed for a simple dinner, or as part of a multi-dish meal. The prep is relatively simple, just a little …
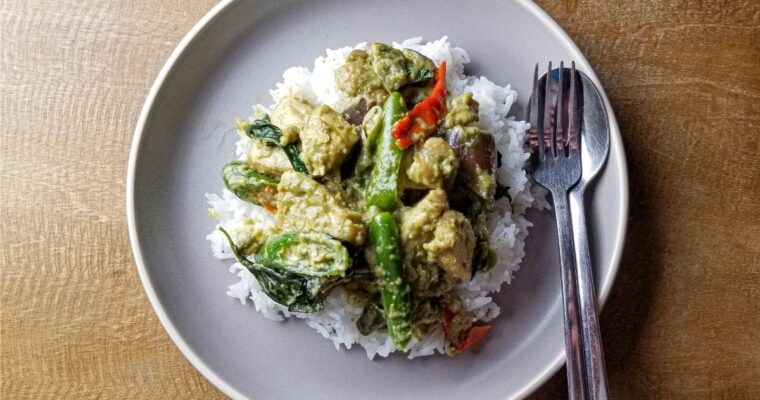
Making a green curry from scratch at home can take some effort, but the results are undoubtedly better than your typical take-out version. The nice thing is, much of the work goes into making the green curry paste and once you have made the paste, …
Making a Thai-style curry paste can be a bit daunting but it really isn’t complicated and will yield much better results than the canned pastes you find in the supermarket. This curry paste can be used to make many different types of green curries, including this version with chicken and eggplant. The trick to making a good curry paste is having the right ingredients, the right equipment and having a bit of patience.
Ingredients
As the produce that we have available here in the US is very different from what you can find in Thailand, it can be a bit difficult to source some of the necessary ingredients. Some items, such as the turmeric and galangal, can be purchased frozen whole and still yield good results. Cilantro roots are just the roots of regular cilantro. Unfortunately many US supermarkets remove the roots before selling them. If you can’t find cilantro with the roots attached, you could just use cilantro stems.
Cilantro with the roots attached. The roots can be rinsed and lightly scraped with the back of a knife before chopping.
Equipment
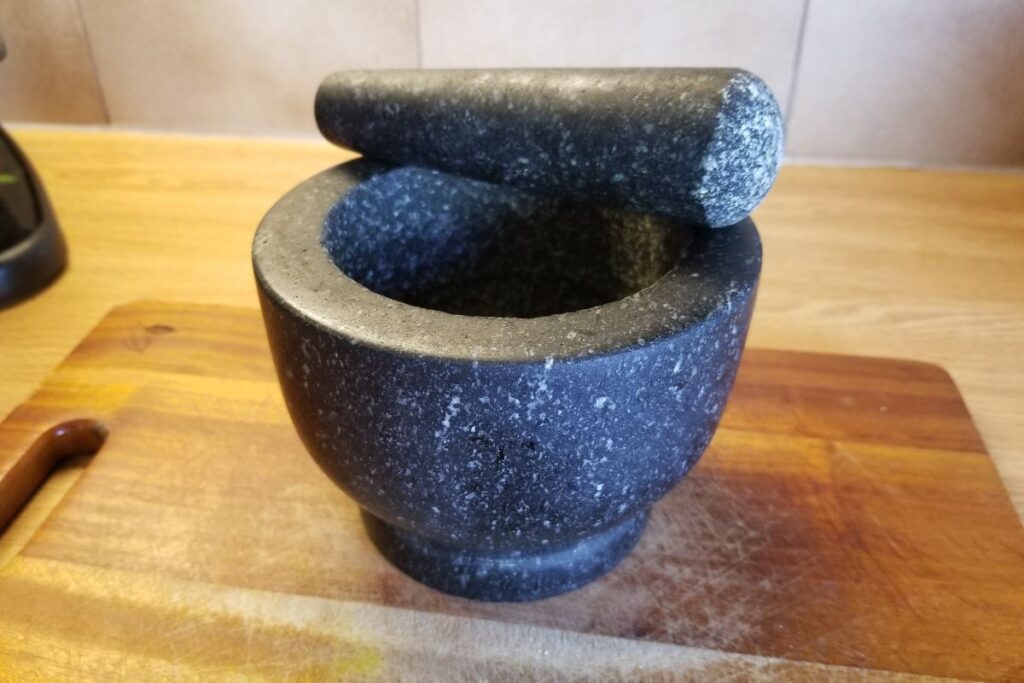
The preferred tool for making a curry paste is a granite mortar and pestle. They are heavy and the surfaces are rough so that you can use the weight and roughness of the pestle to do most of the work for you. Most other styles of mortar and pestle will not do a very good job because of the weight and texture of the materials they are made of.
You could make this paste in a food processor but unless it has very sharp blades, your paste will likely not be as smooth as when it is made in a mortar and pestle. This will affect the texture of your finished curry. A blender could also be used but you may need to add a bit of liquid in the form of water, stock or coconut milk to help the paste blend. This will give you a slightly different texture than a paste made by hand but can yield decent results.
My granite mortar and pestle.
The method
Make sure you cut your ingredients up onto smaller pieces before pounding. This will reduce the amount of effort necessary to break up the vegetables. It also helps to cut fibrous vegetables such and lemongrass and galangal across the grain.
Pounding curry paste in a mortar and pestle can sometimes lead to spicy bits of paste jumping out of the mortar and landing on your hands, arms or even face. This can irritate your skin and eyes. To mitigate this I like to do a few things:
Add the chilis near the end of the pounding process. This will reduce the amount of time you will be pounding the irritating chilies.
Wear gloves. Latex gloves will keep your hands from getting irritated from the peppers.
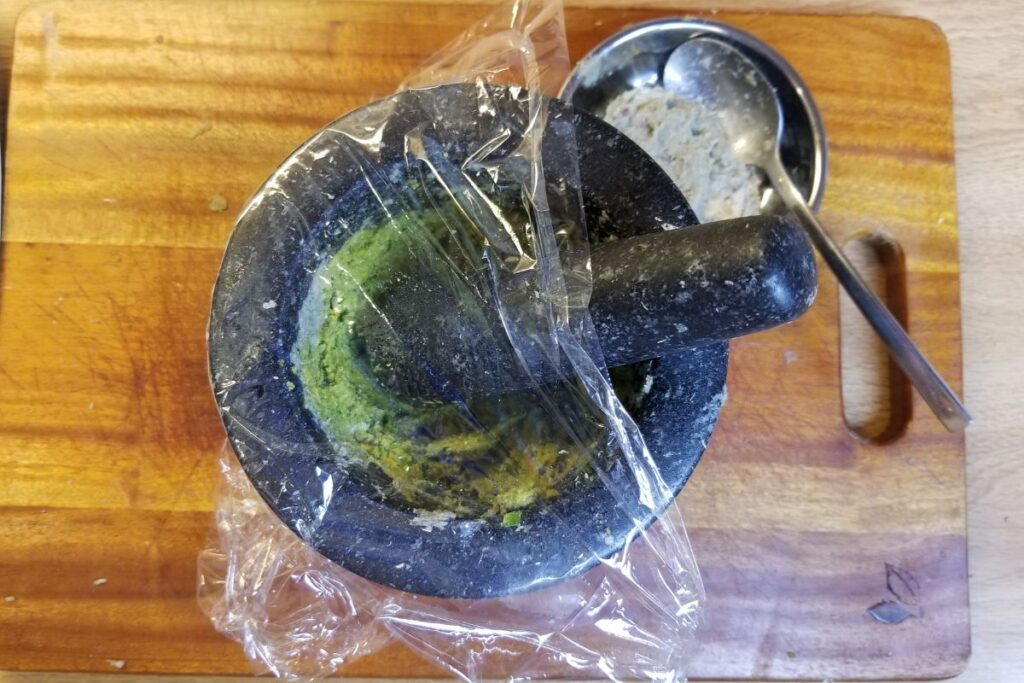
Use the hand you are not pounding with to help cover the opening of the pestle. You could even hold a small piece of plastic wrap over some of the opening. This will keep bits of paste from flying up at your face or arms.
Never have your face directly above the mortar and pestle as this is where the paste is most likely splash you.
Hold a small piece of plastic wrap over the opening with your non-pounding hand to keep curry paste from splashing up at you.
Take your time
Properly pounding a curry paste by hand takes time. Be patient, relax, have a beer. Do not attempt to make curry paste when you are in a rush, this is not a quick weekday 30-minute meal. If you are pressed for time and trying to rush you will likely end up frustrated and with an inferior curry paste.
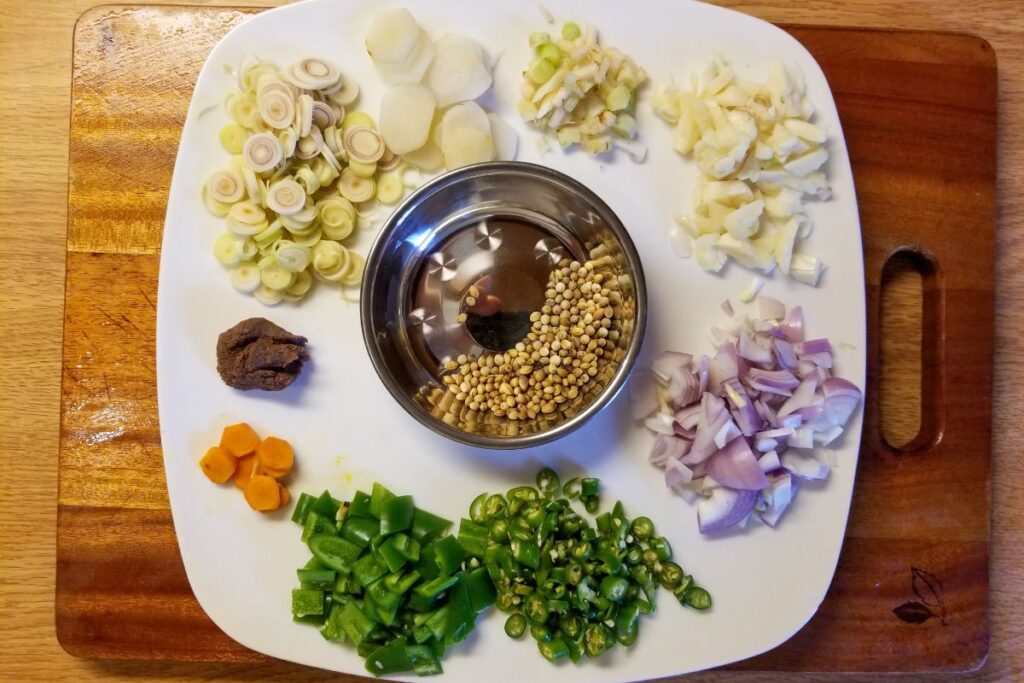
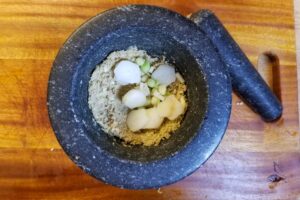
All of the ingredients, prepped and ready to pound. Clockwise from top-left; Lemongrass, galangal, cilantro roots, garlic, shallot, green bird chili, serrano chili, turmeric, thai shrimp paste. White pepper, coriander and cumin in the center.
22gramsthinly sliced fresh lemongrass, tender parts only3 Tbsp.
1pinchsalt
15gramspeeled and thinly sliced galangal1 Tbsp.
7gramscleaned and chopped cilantro roots (or stems)1 Tbsp
25gramsroughly chopped garlic2 Tbsp.
35gramsroughly chopped shallot3 Tbsp.
16gramssliced green Thai bird chili2 Tbsp.
22gramsseeded and sliced serrano chili2.5 Tbsp.
3gramssliced turmeric1 tsp.
10 gramsKapi (thai shrimp paste)1 tsp.
Instructions
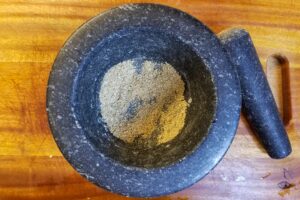
Pound the coriander seed, white pepper and cumin in the mortar and pestle to yield a powder.
Add the lemongrass and the pinch of salt. Pound until smooth. (The salt acts as an abrasive)
Add galangal and pound until smooth
Add cilantro roots and pound until smooth
Repeat with the rest of the ingredients, pounding ingredients one or two at a time in the order shown in the ingredients list. If the mortar gets too full, remove a portion of the paste once it is smooth and then combine everything at the end when everything is smooth.
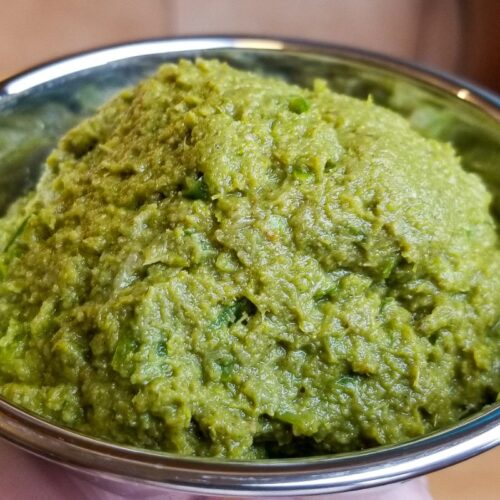
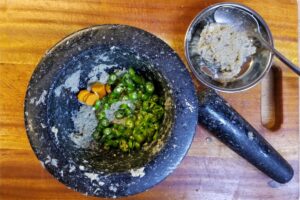
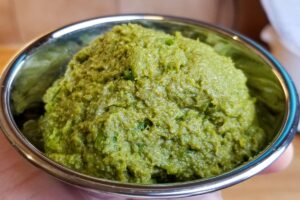
Paste is finished when everything is relatively smooth.
Toasted rice powder is a pantry item that is often used in Northeastern Thai (Isan) and Lao cooking. Sticky rice is toasted until golden and then crushed to achieve a medium-fine powder. This powder is used to provide a nutty flavor and interesting texture to …
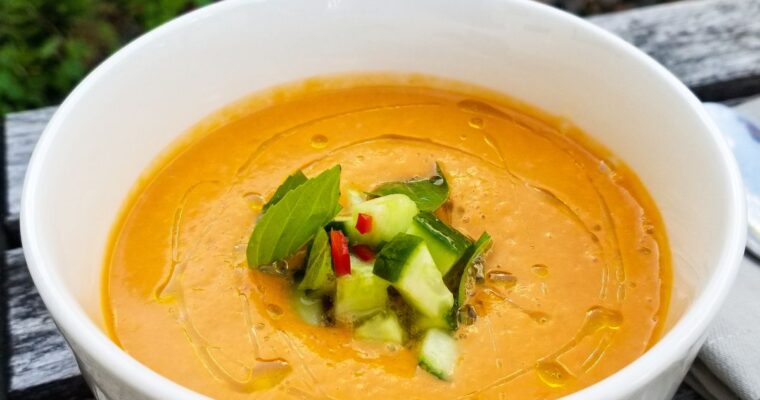
I love cold soups in the warmer months. This is a really simple chilled tomato soup that I often make in the summer when tomatoes are at their best. It takes very little effort to put together and tastes way better than you might expect …
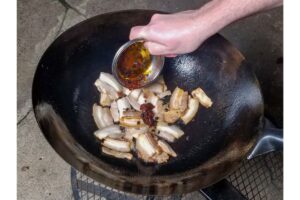
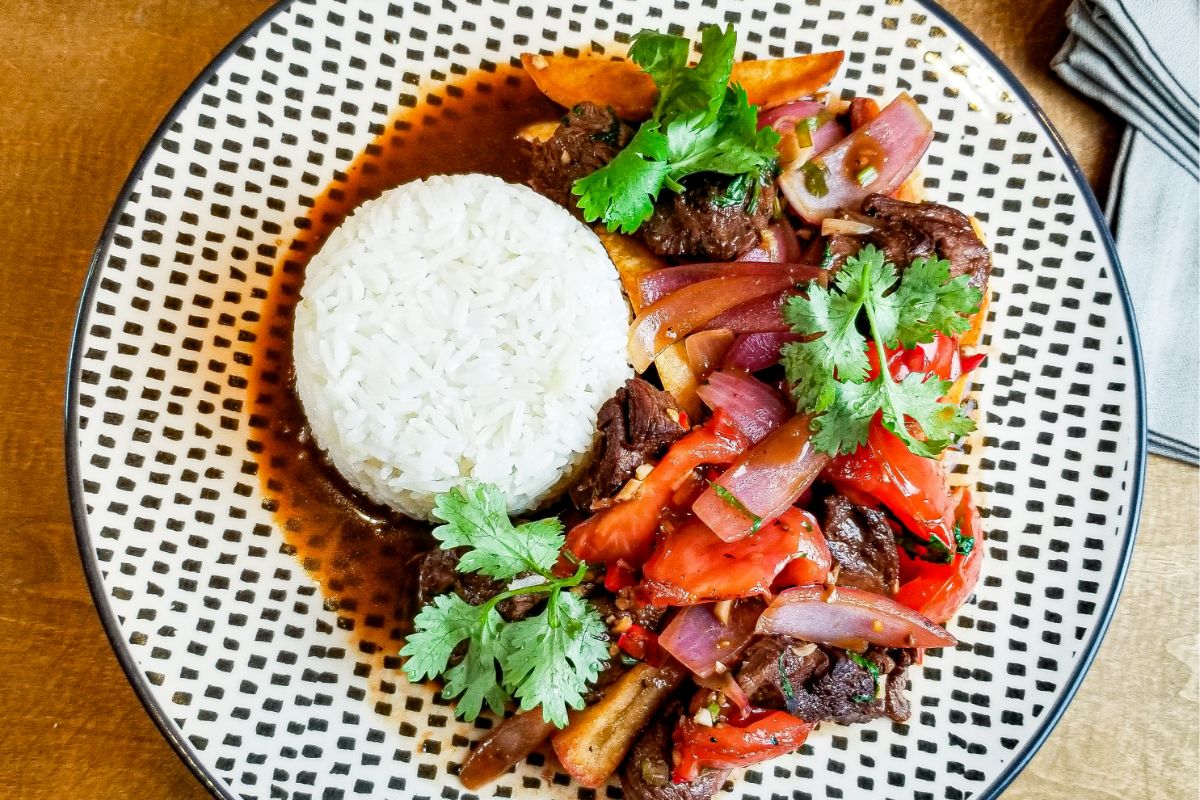
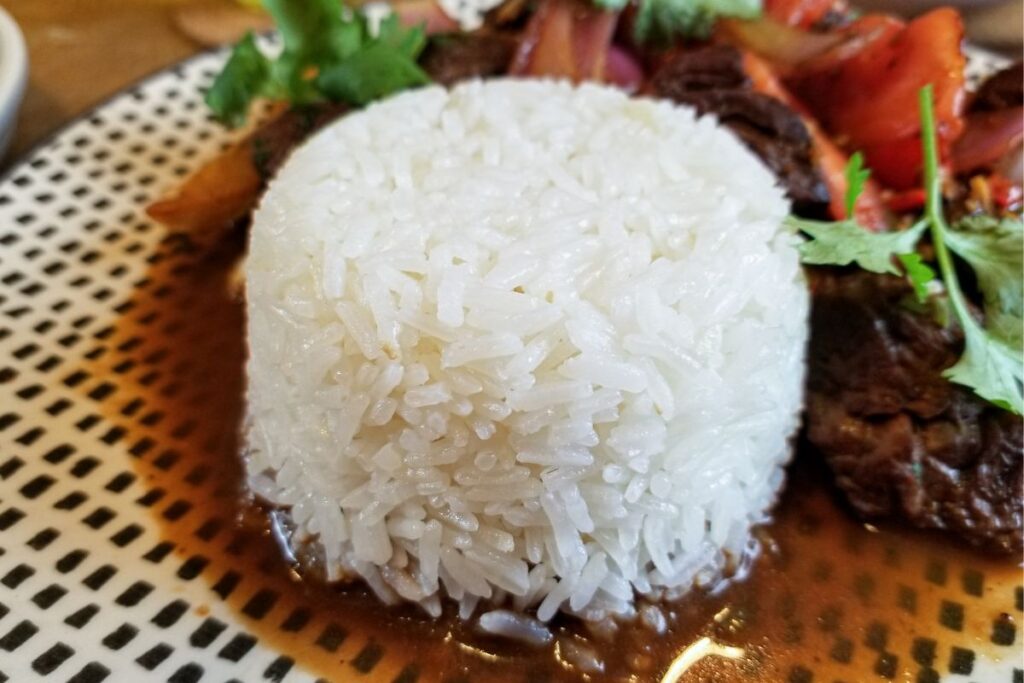
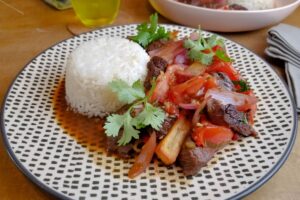
Lomo Saltado just might be my favorite dish of all time. I grew up eating it and to this day, I almost always order Lomo Saltado whenever I go to a Peruvian restaurant. The funny thing is that, at its core, this famous Peruvian dish is actually rooted in Chinese cooking.
Lomo Saltado is a stir fry of beef, onions, tomatoes, and fried potatoes, cooked in a wok, made with soy sauce and served with rice. While the cooking technique and foundation of the dish are undeniable Chinese, the addition of fried potatoes, aji amarillo and tomato are what also make it undeniably Peruvian. This dish really illustrates how Peruvian cuisine is the result of many different cultures settling in Peru over the past few hundred years.
A few things I believe to be necessary for a good Lomo Saltado:
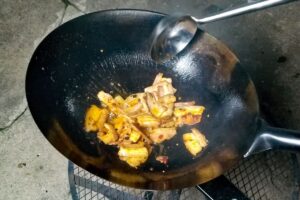
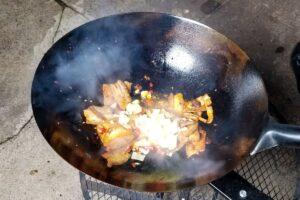
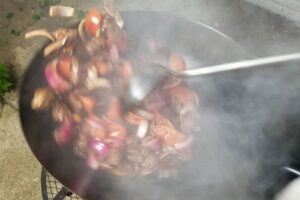
This dish needs to be cooked hot and fast. Cooking a portion of Lomo Saltado should not take more than 3 minutes (but preferably 2) once you start stir-frying, This is probably the most important aspect of this dish. As this is traditionally cooked in a hot wok, you need to make sure however you cook lomo saltado, you cook it over high heat and quickly. The beef should be browned and not overcooked. The tomatoes and onions should be lightly caramelized but still maintain their structure without getting overly soft. And if you can get a few CONTROLLED flare-ups in the pan while tossing, you will be rewarded with that nice smokey flavor that wok cooking is known for (wok hei).
Stir-frying hot and fast.
Expanding on above, do not attempt to cook Lomo Saltado for more than 2 people at once unless you feel comfortable working in batches and stages. I have a very powerful wok burner at home and 2 portions is the maximum that I would cook at one time. If you are cooking for 2 people on a home stove, I would suggest stir frying your meat and veggies separately over very high heat and then quickly combining them at the end with the sauce. This will avoid having the dish simmer instead of stir fry.
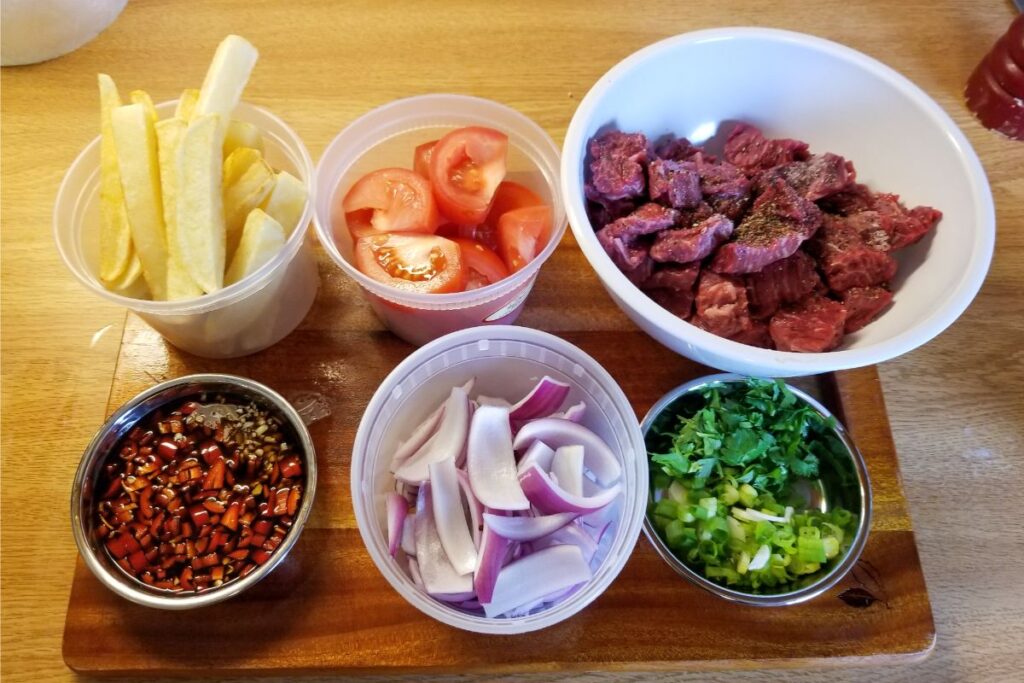
Make sure you have everything ready before you start stir frying! Because the stir frying only takes 2 or 3 minutes, you need to make sure all of your meat, veggies, herbs and sauce ingredients are cut and ready. I also like to make sure the rice and french fries are both hot and waiting on a warm plate when the stir-frying begins.
All of the ingredients cut and ready to go before stir frying
The fried potatoes (french fries) should be served beneath or tossed into the stir fry. The texture and flavor of crispy fried potatoes that have become partly soggy with delicious Saltado juice is one of the best parts. Some people seem to like the potatoes on the side but to me that like having stir fried beef with a side of rice AND a side of french fries. When the potatoes are incorporated into the stir fry, they become a PART of the dish.
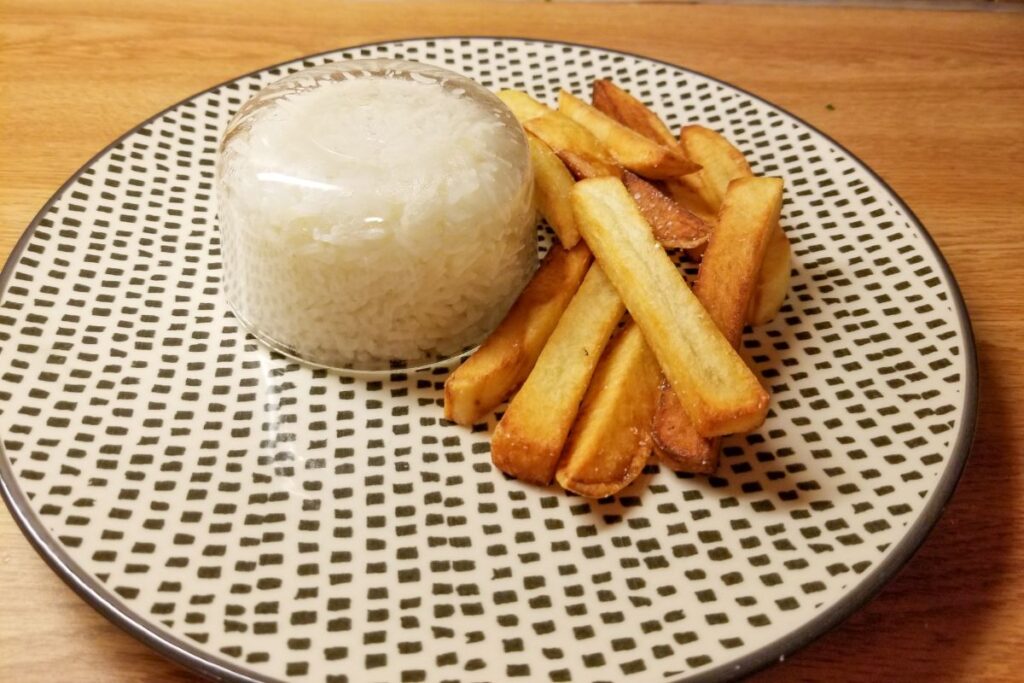
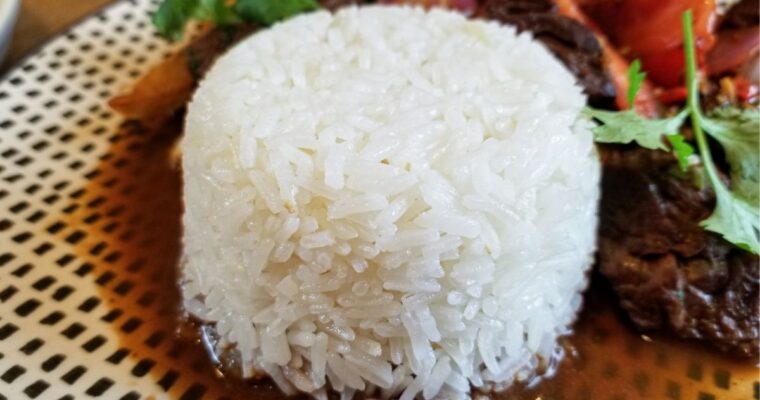
The hot rice and french fries are ready on the plate before beginning the stir fry. I have the rice molded using a glass bowl here.
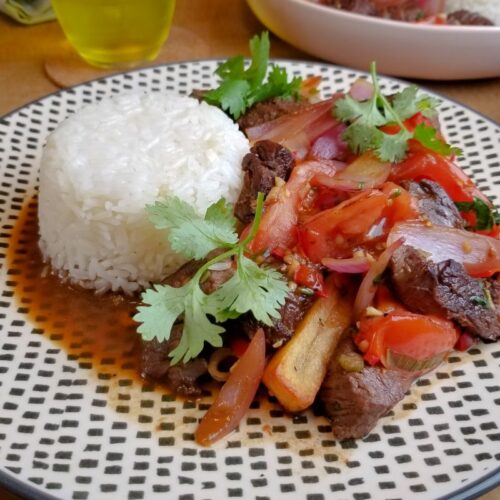
The rice should be served on the same plate as the Lomo Saltado. One of the best parts of eating lomo saltado is the rice that has mixed with the delicious cooking juices that have seeped out of the stir fry.
Delicious Saltado juice mixing with the rice.
A few notes…
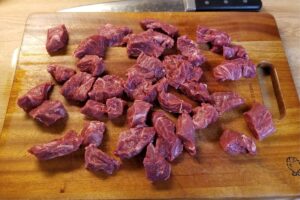
Lomo Saltado would traditionally be made with beef tenderloin. While tenderloin is great for this dish, today we will be making this dish with hanger steak. Hanger is a bit tougher but it has great flavor and lends itself to stir frying. You could really use ANY cut of reasonably tender beef for this dish. I have used skirt steak, strip loin, ribeye…all with great results. Just make sure you try to cut your strips of beef across the grain if possible.
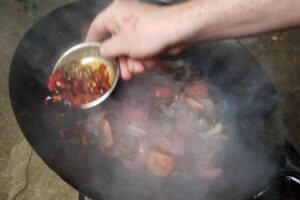
Aji Amarillo is the pepper that is typically used for this recipe. While the flavor of aji amarillo is quite distinct, It can be almost impossible to find fresh here in the US. You can purchase frozen aji amarillo or jarred aji amarillo puree in many Latin American stores but today I just used some spicy red peppers that I found at the market. You could substitute any hot pepper you like.
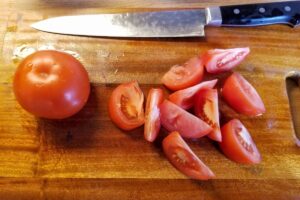
Because they are being stir-fried, the tomatoes that you use should not be the ripe super-soft heirloom tomatoes that you might use for a summer salad. Instead, use any ripe yet moderately firm tomato. Halved cherry tomatoes would work as well.
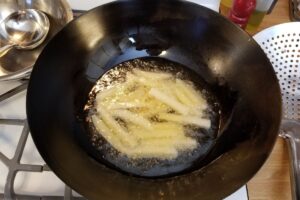
I will explain a quick french fry method in this recipe but you could also use good quality frozen french fries or even just roasted potatoes. Make sure you use a starchy potato for your fries such as russet or kennebec.
If you cook this recipe correctly, it will most likely set off your fire alarm unless you have a great kitchen exhaust or an outdoor kitchen. This is a stir fry and it will create a lot of smoke and maybe a few licks of flame when done correctly. Please be careful. Don’t start a fire. Make sure you have fully read the procedure so you don’t have to look at the recipe while you are actively stir frying. If you don’t feel comfortable with the high heat you could do it at a lower heat, just know that the results will not have that appealing smokey flavor.
The potatoes will be fried twice, once now and once again just before cooking the lomo saltado. If using frozen french fries, you will only need to do the final fry, ignore these instructions.
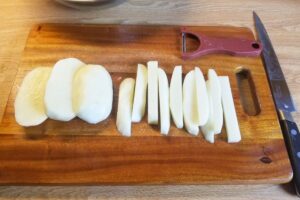
Peel and cut the potatoes into 1/2 inch thick french fries
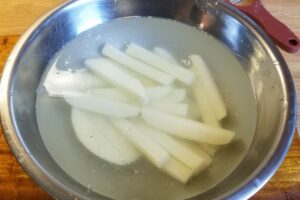
Soak cut potatoes in cool water for at least 10 minutes to wash away some starch
In a medium pot or wok, Preheat oil to 320 Fahrenheit. Use enough oil to comfortably submerge the potatoes. Do not fill the pot or wok more than 1/3 of the way up to avoid splashing hot oil.
Remove potatoes from water and pat dry with paper towels.
Carefully add potatoes to the hot oil.
Once potatoes are added, temperature will drop. Adjust heat to maintain around 290 Fahrenheit while cooking. Cook potatoes for about 6 minutes, until just cooked through. They should not be getting much color.
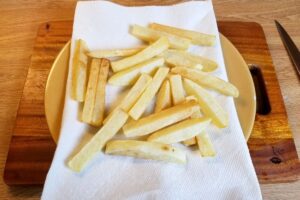
Remove potatoes from oil and allow to drain on a plate lined with paper towels. Allow to cool while you prepare the rest of the stir fry.
Save your fryer oil for the final fry later on.
Prepare the stir fry ingredients
Cut the beef into roughly 1 x .5 x .5 inch strips. Try to cut the strips against the grain if possible
Season the beef with 2-3 grams salt (about 1/2 teaspoon of kosher salt) and a few grinds of black pepper. Set beef aside.
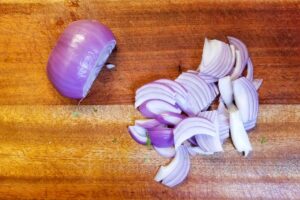
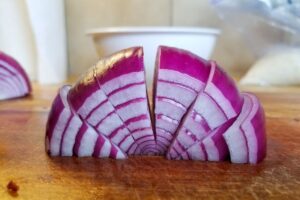
Cut the onion into 1/2 inch wide "petals". Start by cutting the onion in half, pole to pole. Remove stem and root ends and then cut the onion into wedges, as shown. Separate layers of onion by hand.
Cut the tomatoes into 1/2 inch wedges. Set aside
Place chopped cilantro and scallion together in a small container and set aside
Stir fry sauce
Place garlic, ginger and chili into small container
add soy sauce and vingegar and set aside
Final Assembly
Make sure you have all of your ingredients cut and within reach. Also make sure your pot of rice is cooked before starting to stir fry.
In a medium pot or wok, Preheat oil to 360 Fahrenheit. Use enough oil to comfortably submerge the potatoes. Do not fill the pot or wok more than 1/3 of the way up to avoid splashing hot oil.
Add the par-cooked (or frozen) french fries to the hot oil.
Once potatoes are added, temperature will drop. Adjust heat to maintain around 350 Fahrenheit while cooking. Cook potatoes while stirring until golden brown and crispy, about 5 minutes.
Remove potatoes from hot oil and drain on a plate lined with paper towels. Season with salt.
Place the hot potatoes and some cooked rice on a warm plate.
Now you can start the actual stir fry…..
Place a large saute pan or wok on the hottest burner you have.
Preheat about 2-3 tablespoons of oil over the highest heat possible. You will stay at maximum heat the whole time.
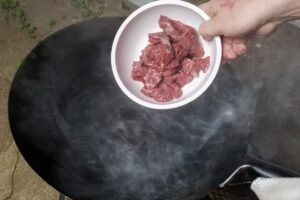
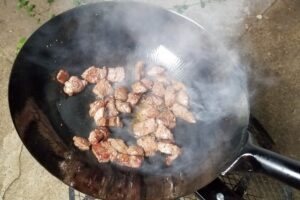
Once oil just begins to smoke, add the beef to the pan and allow to brown, stirring or tossing occasionally. A few controlled flare ups throughout this whole process is a good thing. BE CAREFUL NOT TO BURN YOURSELF.
Cook beef approximately 30 seconds.
If using a home stove, remove beef from pan now, and set aside. Clean out the pan and get very hot again with fresh oil before proceeding to next step
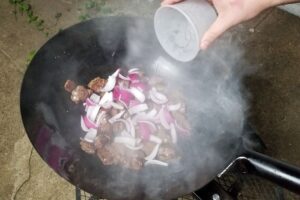
Add onions and stir fry for an additional 20 seconds
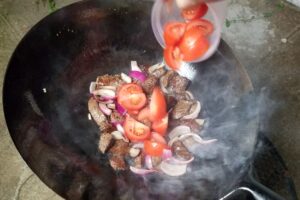
Add tomatoes and stir fry for an additional 20 seconds
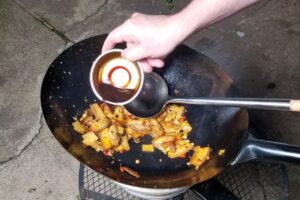
Add sauce around the edges of the pan or wok, allow to sizzle and continue tossing or stirring for 15 seconds.
If you removed beef from pan, add it back in now and stir fry for 20 seconds before moving to next step.
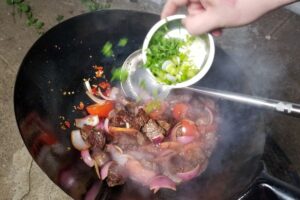
Add cilantro and scallions.
Stir fry about 20 more seconds until everything has come together.
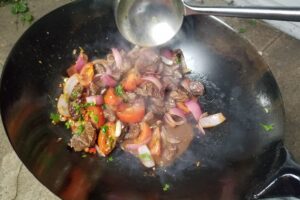
Turn off heat. There should be some sauce at the bottom of the pan at this point. Adjust seasoning with a little salt if you like.
Serve saltado and its juices on top of the french fries and enjoy!
This recipe was taught to me by my dad and I continue to make it the same way to this day. This method for cooking rice is actually quite typical in Peru and accompanies a number of Peruvian dishes. It is almost always seen with …
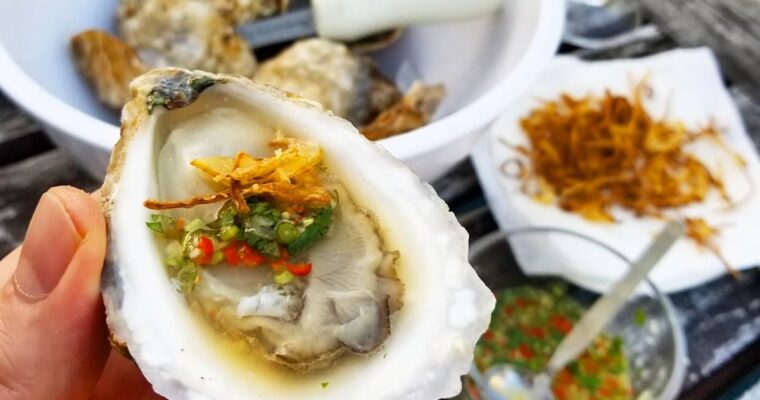
I have enjoyed chilled oysters about a million different ways. I’ve had them plain, with a little citrus, and with a multitude of different cocktail sauces, hot sauces and mignonettes. All of these preparations can be amazing but my favorite way to eat oysters, hands …
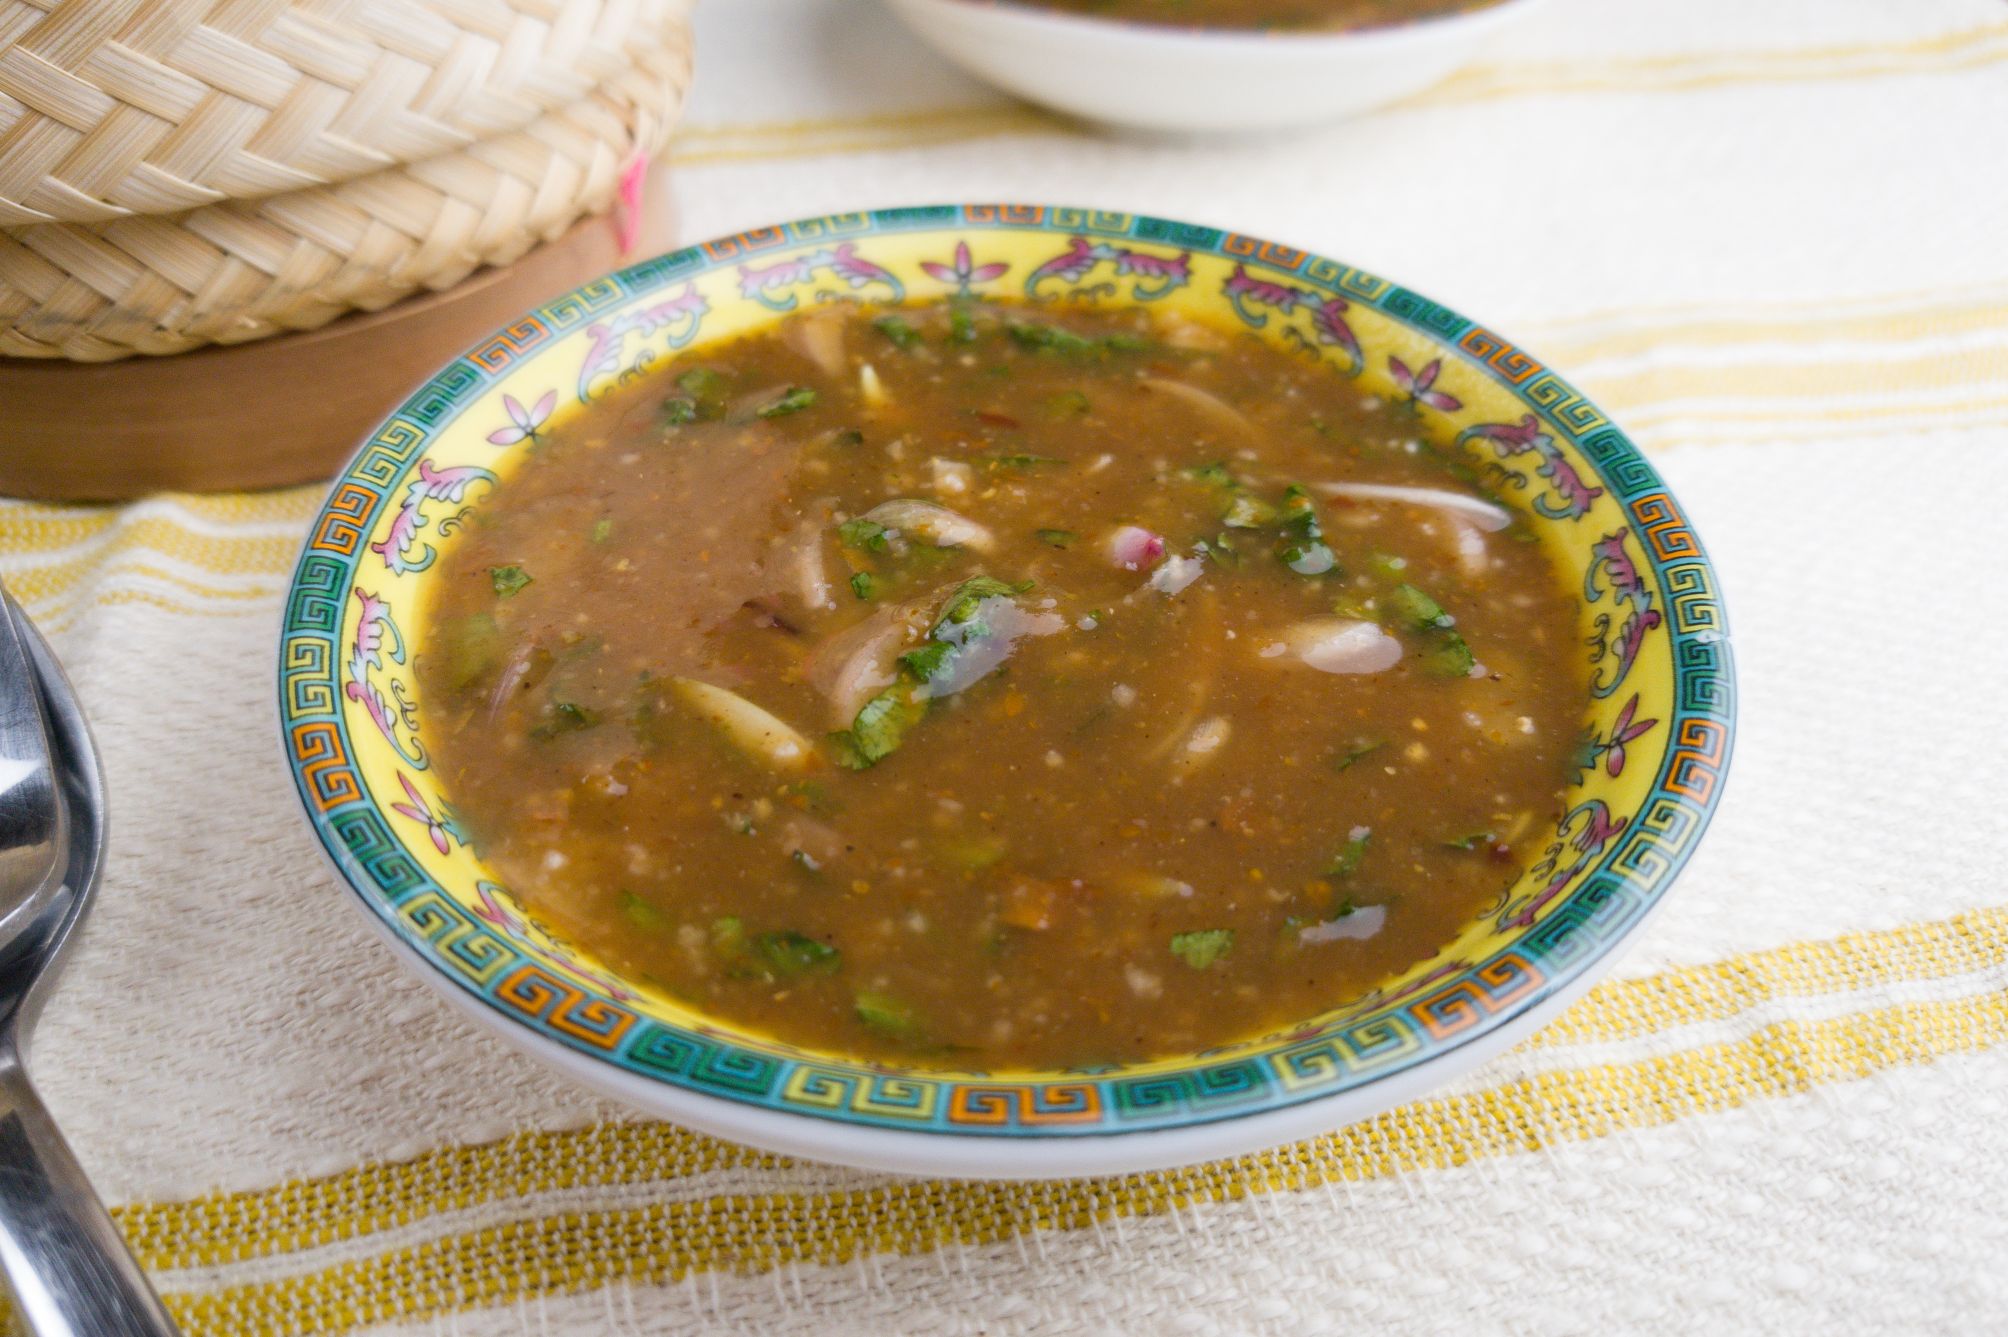
This dipping sauce is amazing on all sorts of grilled meats. I particularly like it when it is served with Gai Yang, Thai grilled chicken. There are many recipes for nam jim jeaw but this one is made using prepared tamarind for acidity. Some recipes use lime juice but the idea is always the same. A tangy, salty, spicy, and barely sweet sauce to accentuate your grilled meats.
Prepared tamarind can be a bit confusing to some people but it is actually quite simple. The flesh of the tamarind fruit, which is a bit dense and chewy, is mixed with water until it reaches the consistency of a puree. This “puree” is then used in a number of dishes to lend acidity and flavor.
You most often see tamarind in two forms here in the US, jarred prepared tamarind and packaged tamarind pulp. If you find prepared tamarind, you don’t need to do anything more to it, it is ready to use in most recipes. If you find tamarind pulp, you need to takes a small piece and put it in a bowl with an equal amount of warm water. Let is sit for a few minutes. Using you hands, massage the tamarind pulp until it starts to loosen up. keep adding water and massaging until an apple sauce consistency is achieved.
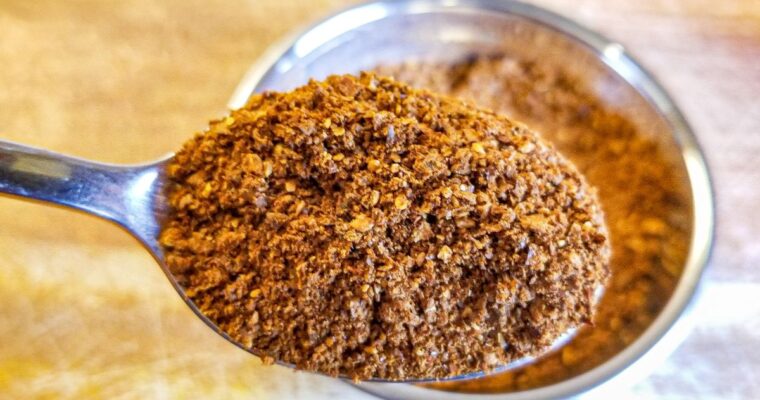
Make sure you use a good quality roasted chili powder . It is easy to make at home. Dry arbol chilies works well for this, but you can use any dry chili to suit your taste. Remove the stems and seeds from the chilies. Toast them in a 350 Fahrenheit oven until they are aromatic and start to deepen in color, about 6 minutes. Cool and crush in a mortar and pestle or a spice grinder into a coarse powder. Make extra and you can use it for other dishes.
The toasted rice powder is made by toasting uncooked sticky rice in a pan or in the oven until it is a light golden color. Use medium heat (or a 350F oven) and toast for 10 to 15 minute. After toasting, allow it to cool and crush in a mortar and pestle until a course powder similar to ground coffee is achieved. The toasted rice powder brings an interesting texture and nutty flavor to the sauce.
A lot of people I know have trouble cooking sticky rice at home. Can I use any type of rice? How do I cook it? Do I need special equipment? These are all great questions. Here is my method, which is simple and yields solid …
A few words on Gai Yang – ไก่ย่าง Grilled chicken with papaya salad and a bit of sticky rice is easily one of my favorite meals on earth. Sitting outside on a hot day there is nothing better, especially if you wash it down with …
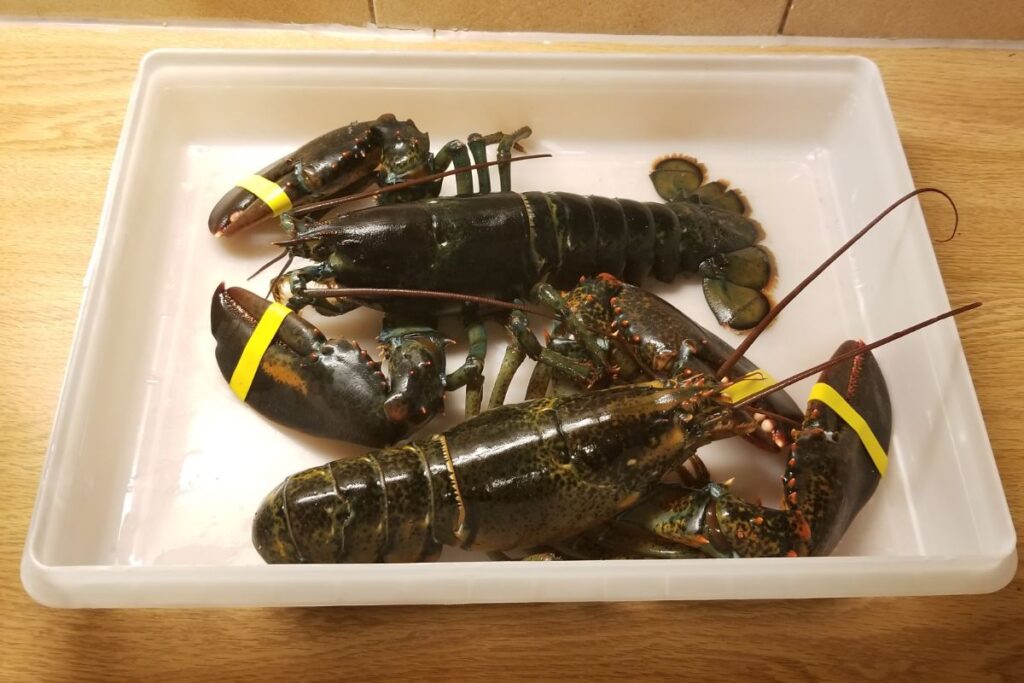
This is my method for cooking and cleaning lobsters to be used for stuffing. Make sure the lobsters are alive and have visible signs of activity before cooking. If the lobsters are not moving at all, discard them. If the lobsters are larger or smaller than 1.25#, increase or decrease the cooking time by a minute or two.
You will need:
2 lobsters, 1.25# each
Large stockpot
Large bowl, filled with ice water
Tongs
Knife
Get Started
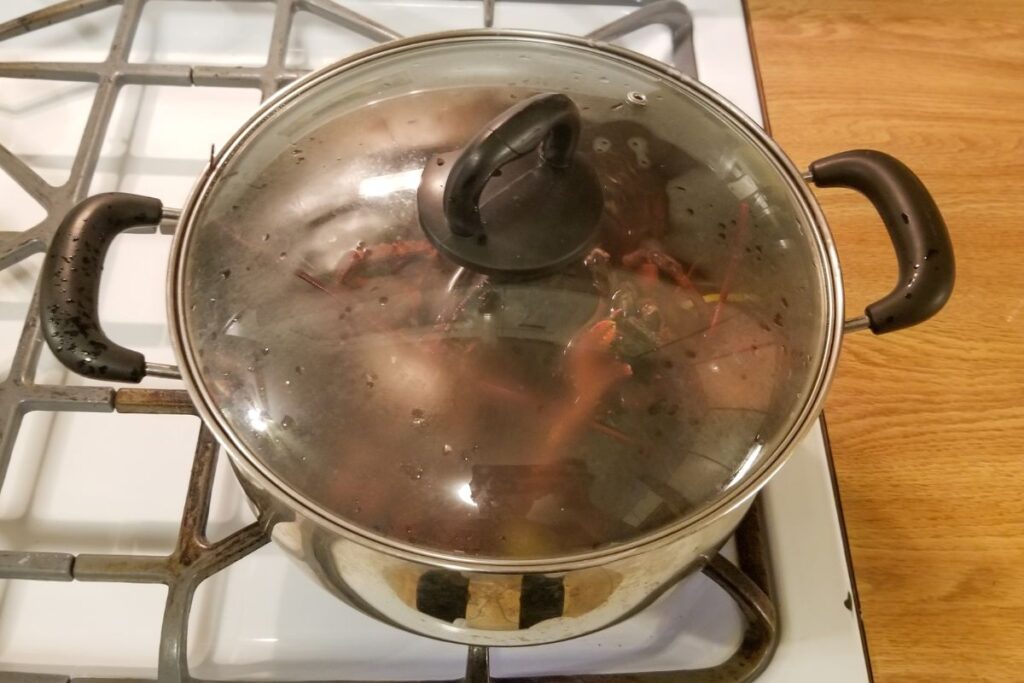
Fill the stockpot with water and bring to a boil. There should be enough water in the pot to submerge both lobsters. If not, you can cook one lobster at a time. Leave the rubber bands on the lobsters while you are cooking them.
Using tongs, place the live lobsters into the pot of boiling water. Cover with a lid and cook over high heat for 5 minutes. Water will lose its boil for the first few minutes of the cooking time, that is OK.
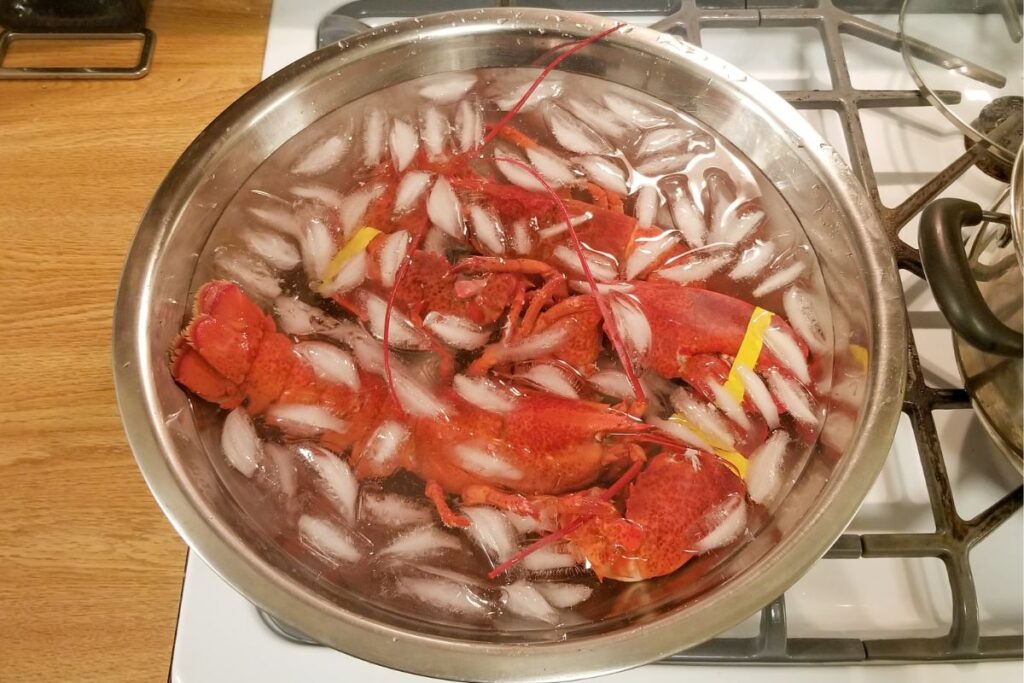
Using tongs, remove the lobsters from the pot and place into and ice water batch to cool. allow the lobsters to cool in the ice water for 10 minutes
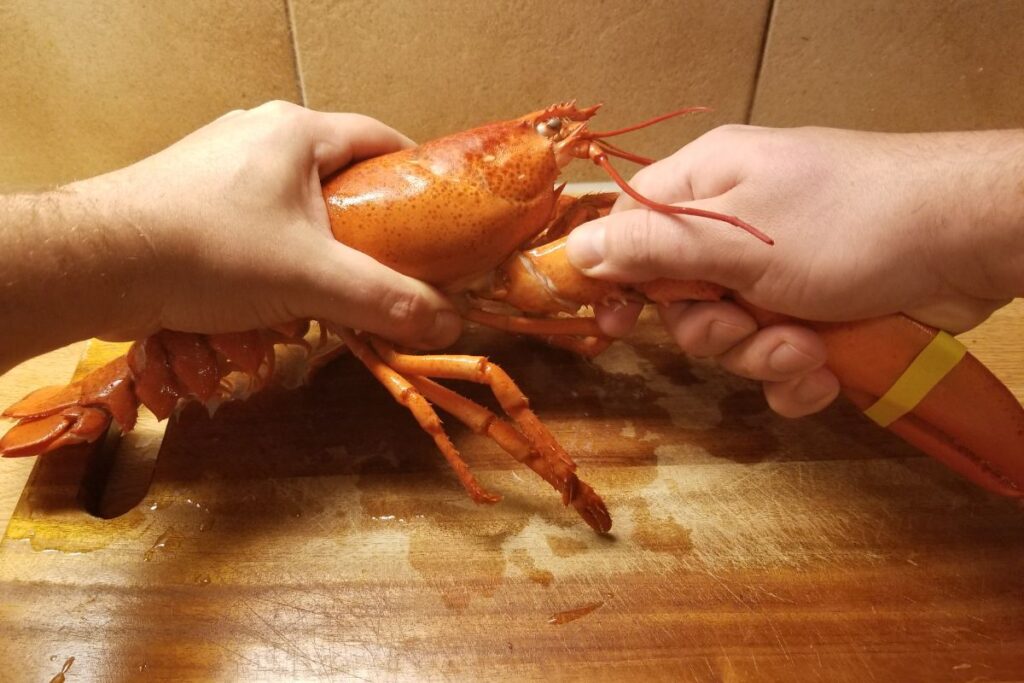
Once the lobsters are cooled, remove them from the ice bath. Grab one of the lobsters and remove the claws from the body. This can be done by firmly twisting the arm and claw away from the body. You can use a kitchen towel to hold on to the lobster if necessary.
Remove the smaller legs from the body as well. These can be discarded, used for stock or even harvested for the small amounts of meat they contain.
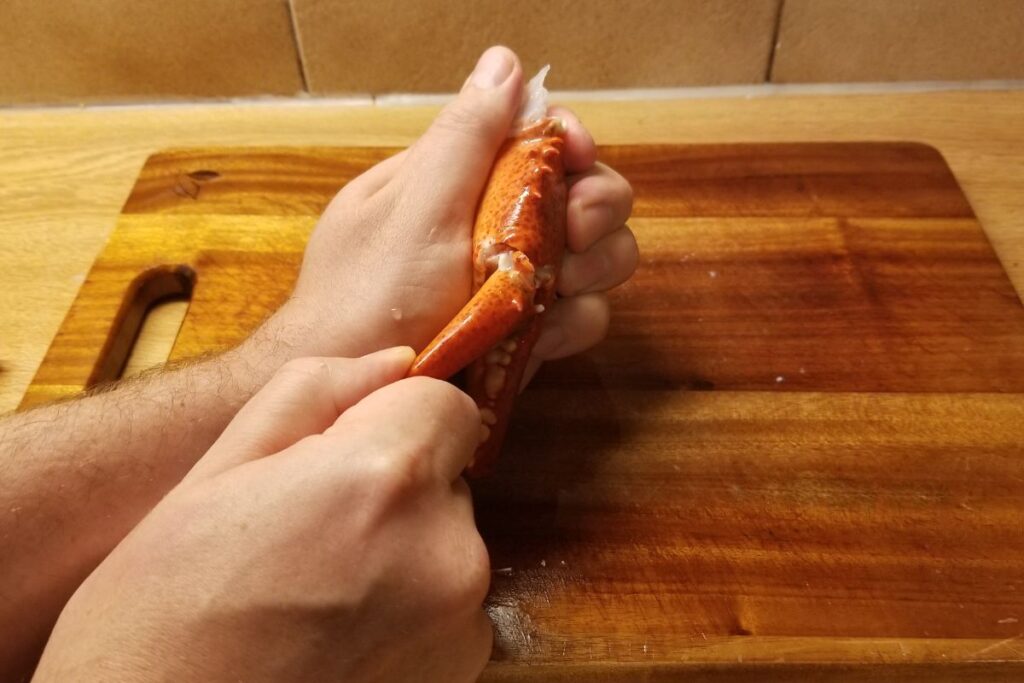
Separate the claws from the knuckles (“arms”) by twisting them apart.
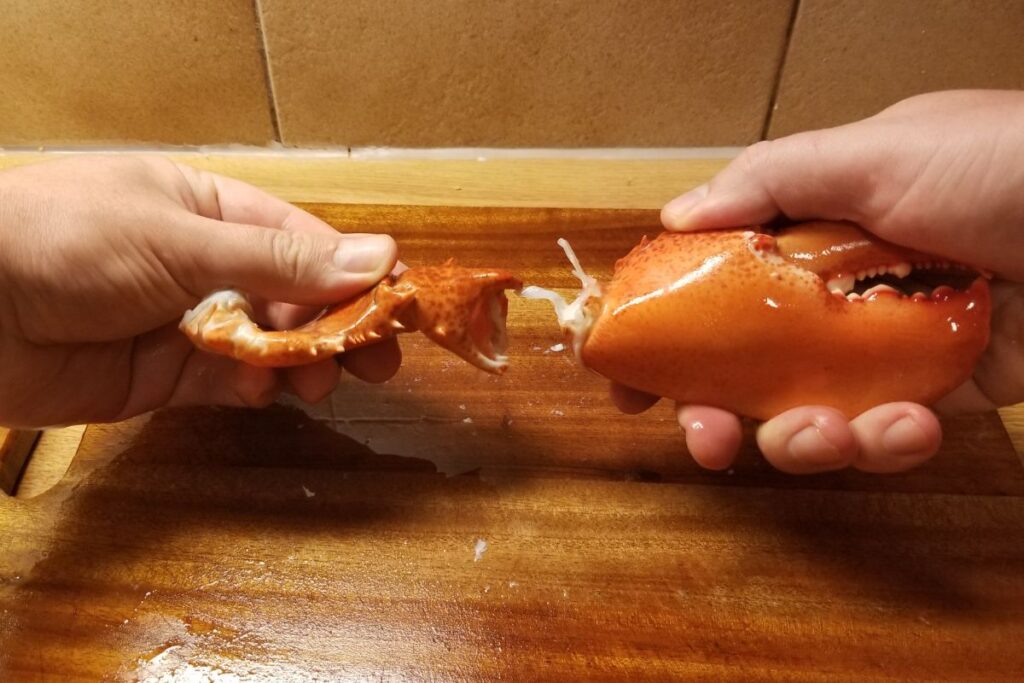
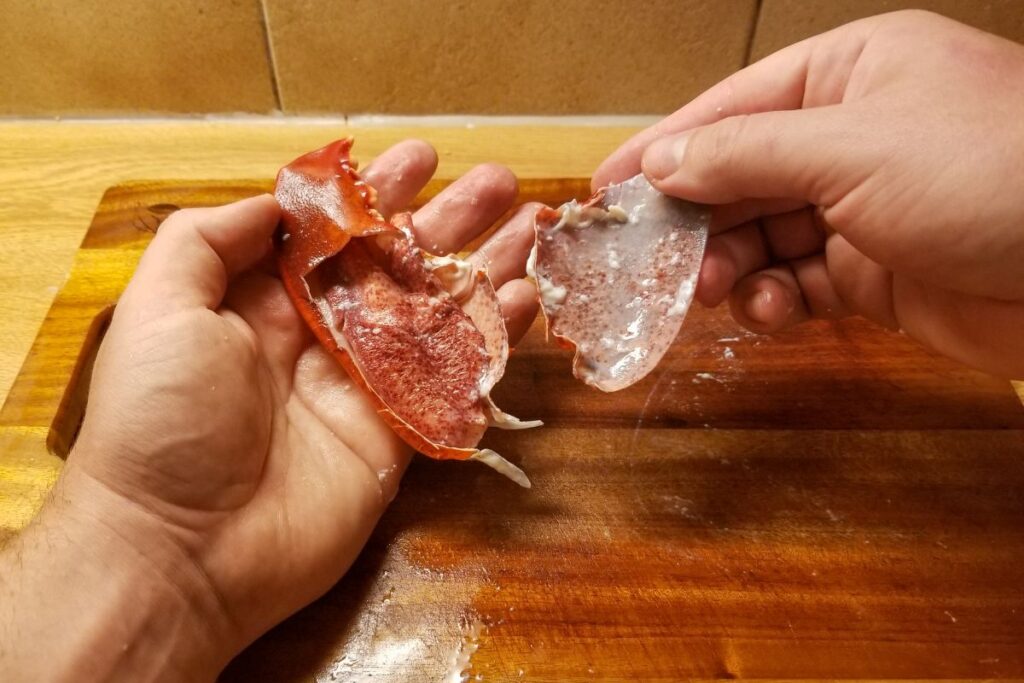
To harvest the claw meat, start by firmly holding the claw in one hand while pulling the “pincer” to one side until it cracks.
Pull it towards the other side until it cracks again.
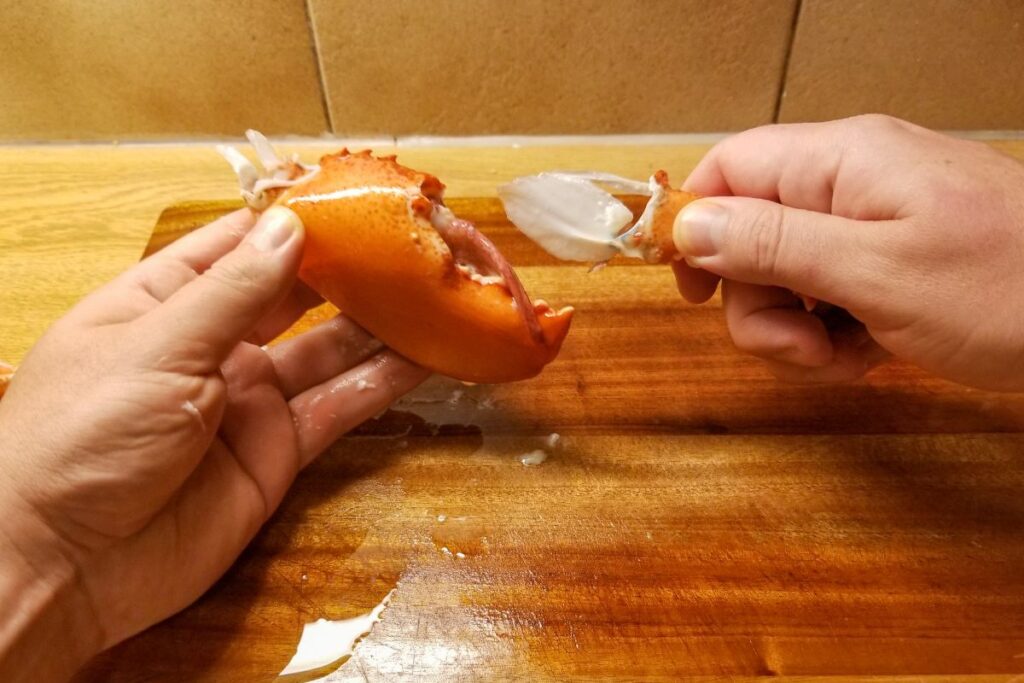
The “pincer” should now be loose from the rest of the claw and can be pulled off.
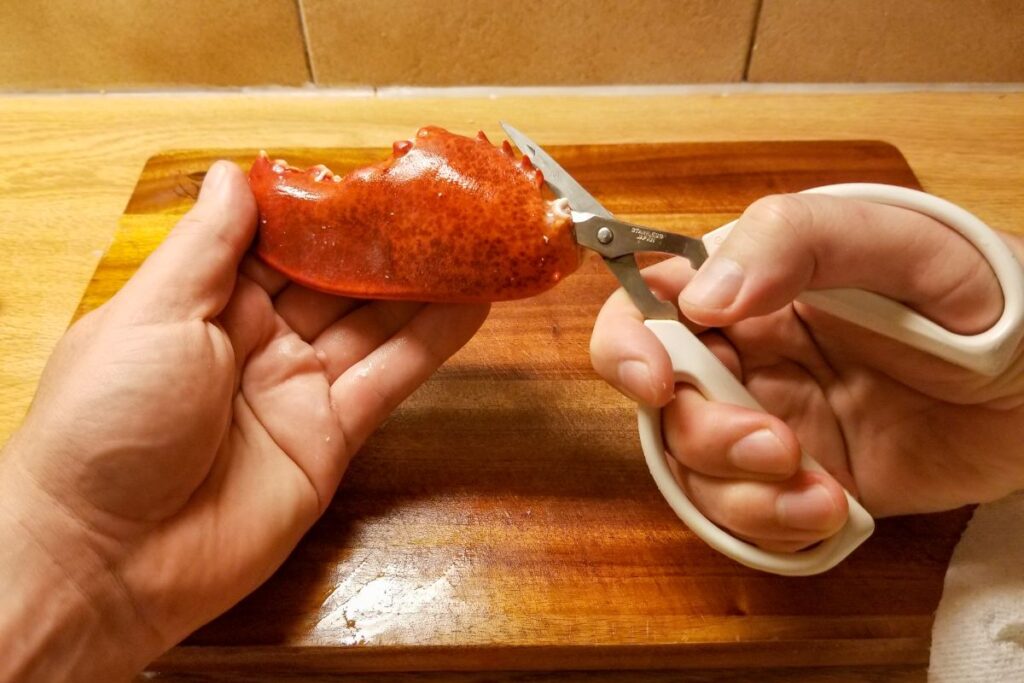
Use a pair of kitchen shears to carefully cut the shell of the claw to reveal the claw meat.
Pull out the claw meat and set aside. There will occasionally still be a piece of hard cartilage that runs through the center of claw meat. this can be removed now or when dicing the meat.
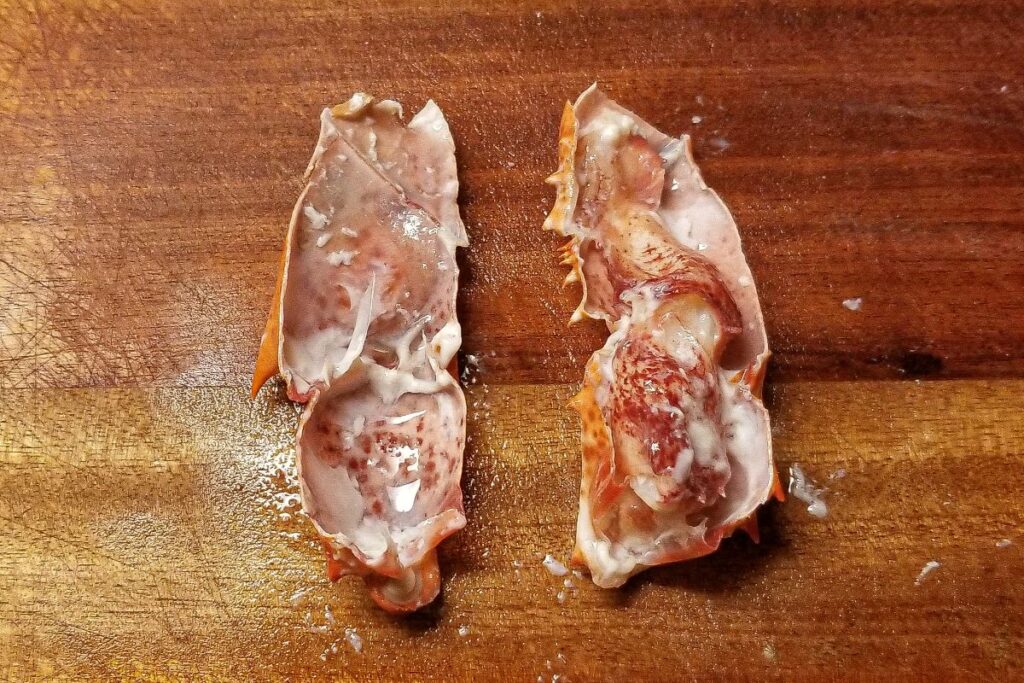
To clean the knuckles, use the shears to cut along one side of the knuckle shell.
Repeat this cut on the opposite side of the knuckle in order to separate the shell into two halves and expose the knuckle meat. Set aside the knuckle meat.
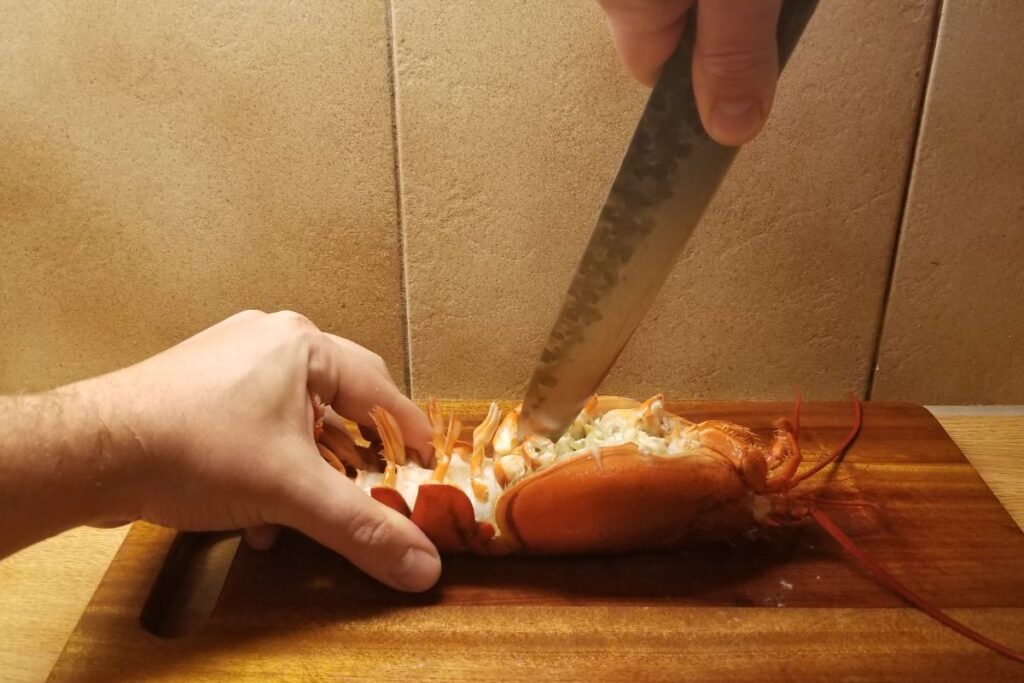
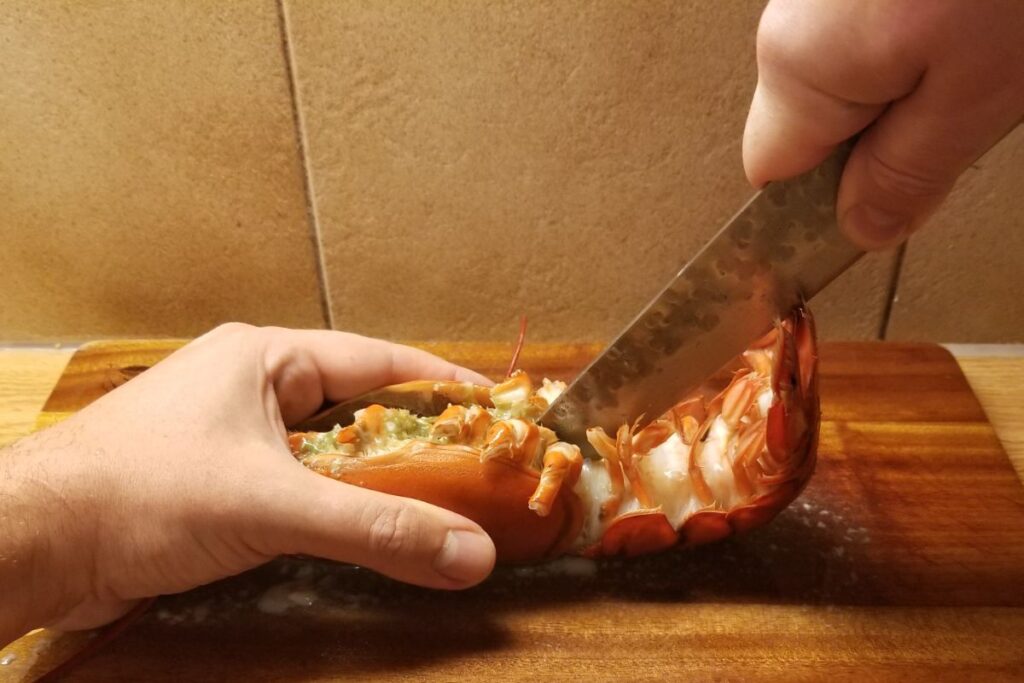
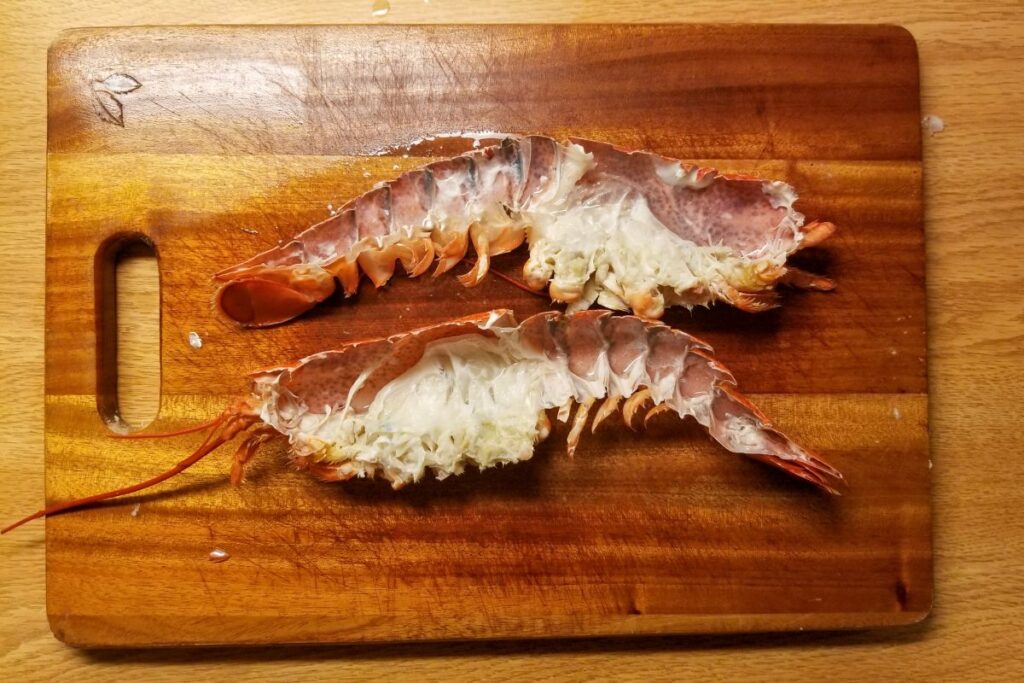
To clean the lobster bodies, place the lobster on the cutting board and CAREFULLY drive the knife through the center of the lobster until the tip of the knife is touching the cutting board. Make sure you are holding the lobster firmly with your other hand while you do this. Use a kitchen towel to hold the lobster if necessary to get a firm grip.
Crank the knife down towards the board, cutting the lobster head in half. Try to make this cut as even and clean as possible as you will be using the shell as your serving vessel.
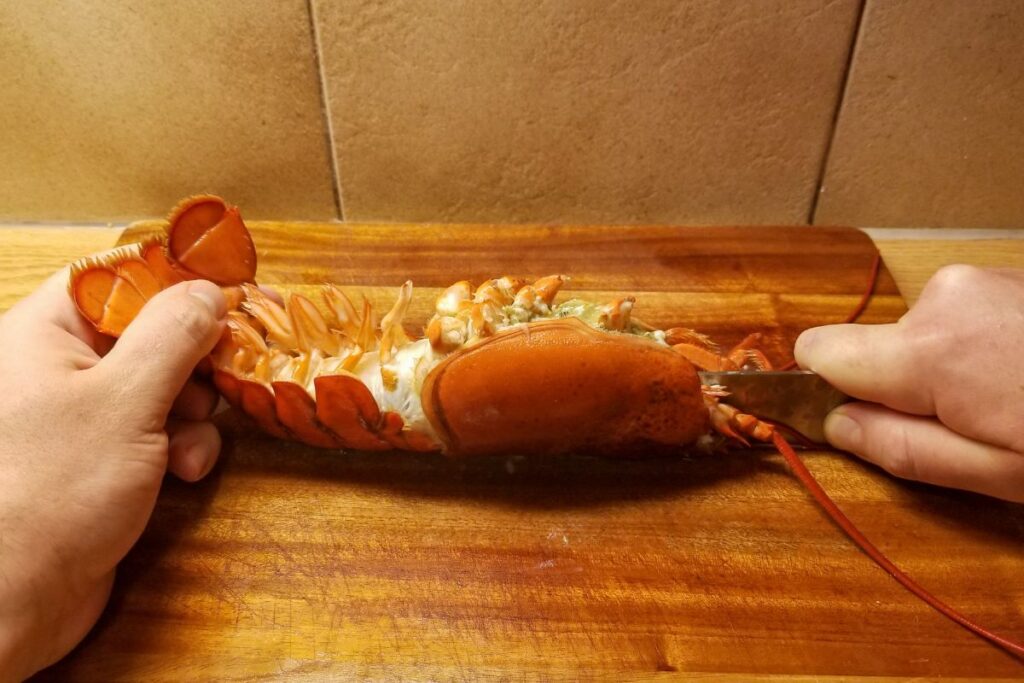
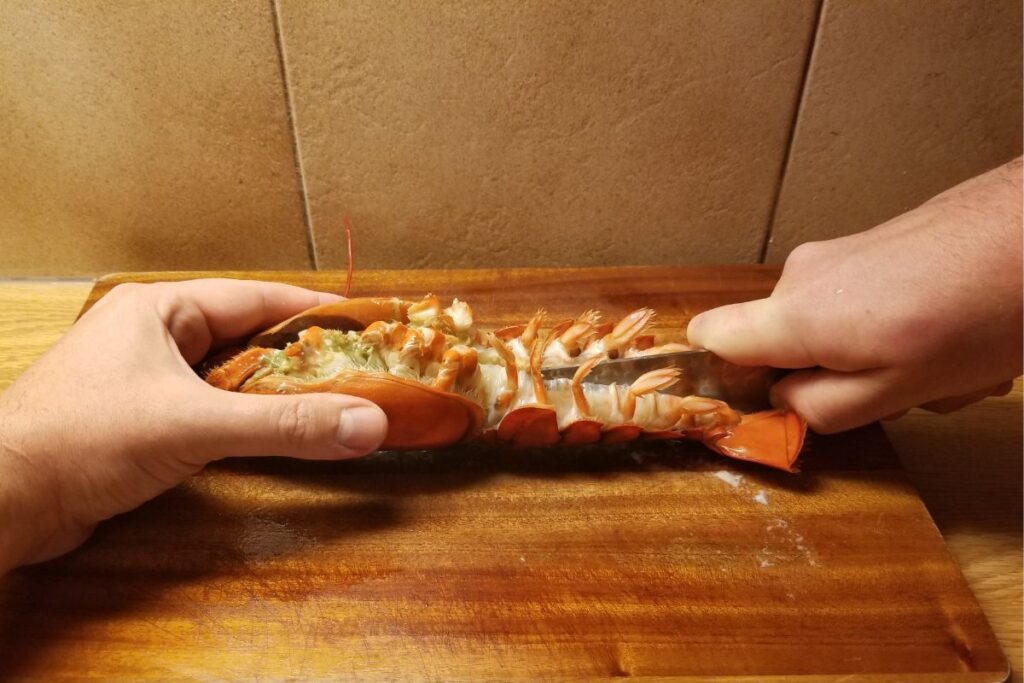
Turn the lobster around and insert the tip of your knife into the same spot as before, making sure the tip of the knife is touching the cutting board.
Crank the knife down like before, this time cutting the tail in half.
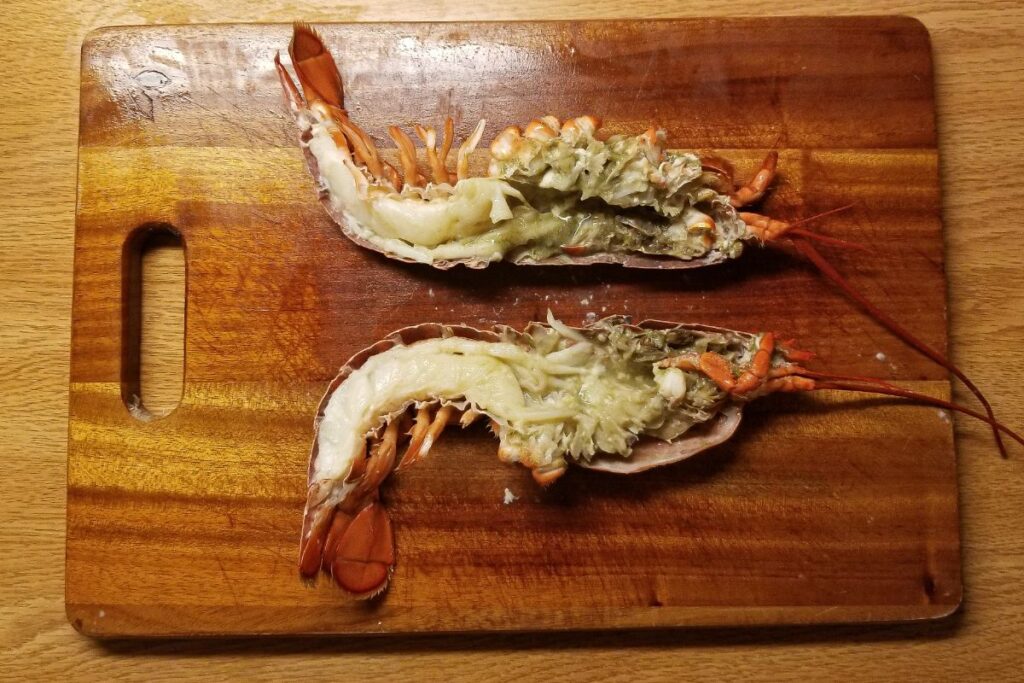
The lobster should now be separated into 2 halves.
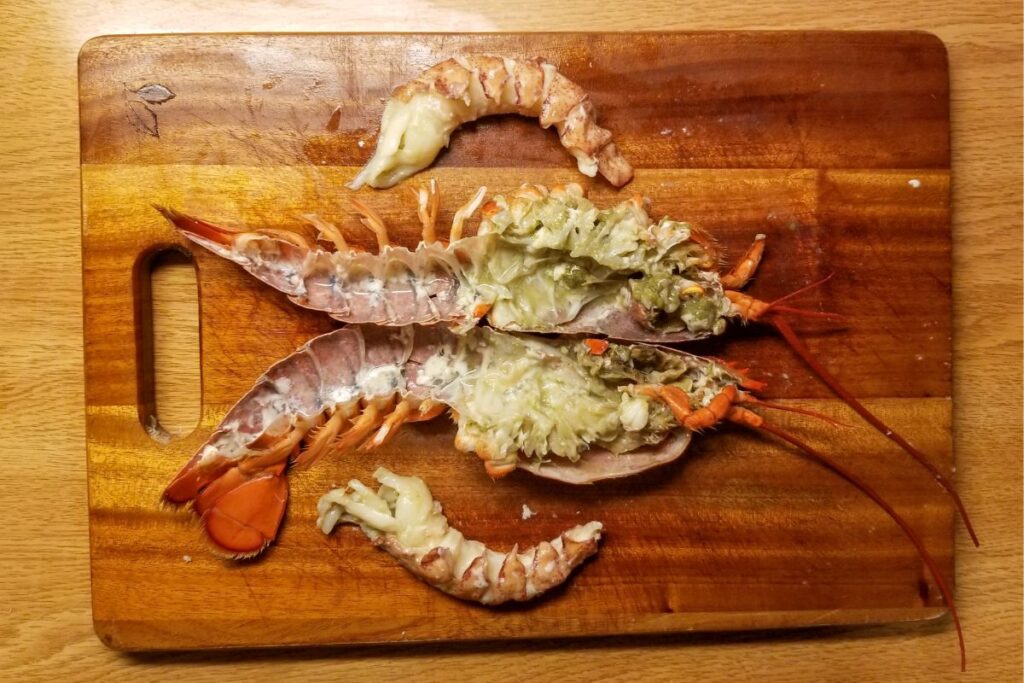
Pull the lobster tails from the shell. If there is a little bit of the digestive tract left in the tail, simply remove it.
Carefully rinse the shells under cold running water and use your fingers to wash away the head cavity. Try to make sure the shells don’t fall apart while cleaning.
Repeat this entire cleaning process with the second lobster. Choose the two nicest half-shells to use for stuffing and discard the other two (keep all four if making smaller appetizers).
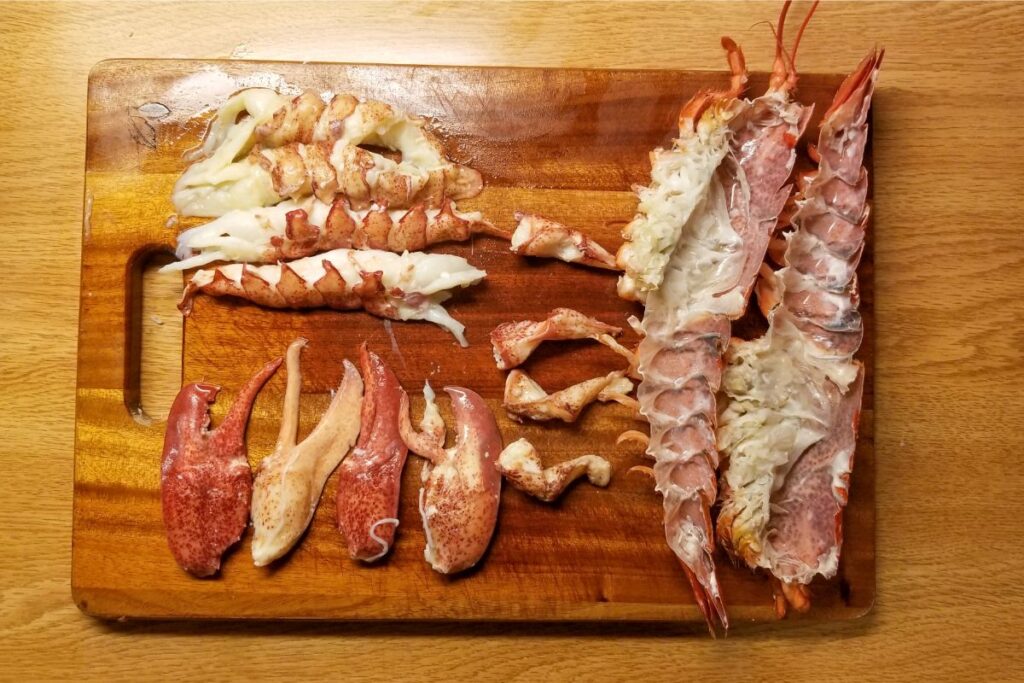
When you are all done you should have:
4 pieces tail meat
4 claws
4 knuckles
2 half-shells (4 if you are serving smaller appetizers)
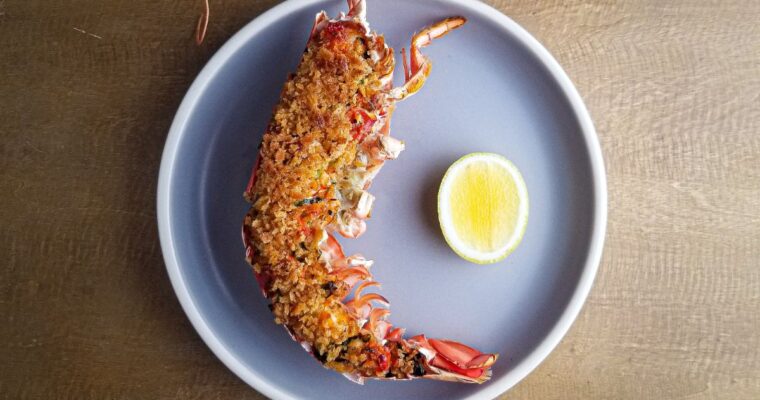
There you have it! The hard part is over and now you can get on with the fun part, stuffing and roasting the lobsters. Keep the lobster meat and half-shells in the fridge, covered, until you are ready to assemble the dish. The lobsters can be cooked and clean a day or two in advance if necessary.